|
MADSLIDE - 2300 - part III [a.k.a. DARK MATTER] This is my new model driven by the unseen forces Gravity, Electricity, Magnetism and Solar Radiation |
|
|
Having finished the airframe it was time to move on, progress has been slow so I am now mid-June. I covered the fuselage fin and tailplane with 25gsm glass and epoxy resin. I sanded it surfaces and gave them a coat of clear lacquer.
It is a
simple job and luckily enough the plain weave glass coped with the
compound curves of the fuselage, once again not my best work but
good enough I should say. When I finally add my decals and chrome
decoration one's eyes will be drawn away from my little errors.
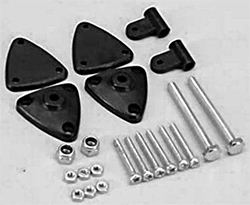
Following the plan I am just using the adjustable DuBro horns used by BPLR and Mathieu Davy. These stand vertically, effectively, and I shall probably use Dyneema cord in place of steel wire for the pull-pull of both the elevators and the rudder. |
 A little trick when doing this is to roll a toilet roll over the glass after it is wetted out, very carefully, to soak up any excess resin you may have applied and possibly adding more to 'drier' areas. Its a good idea to keep an eye on the resin as it sets as air bubbles may appear; there can be pushed down while the resin is still 'green'. |
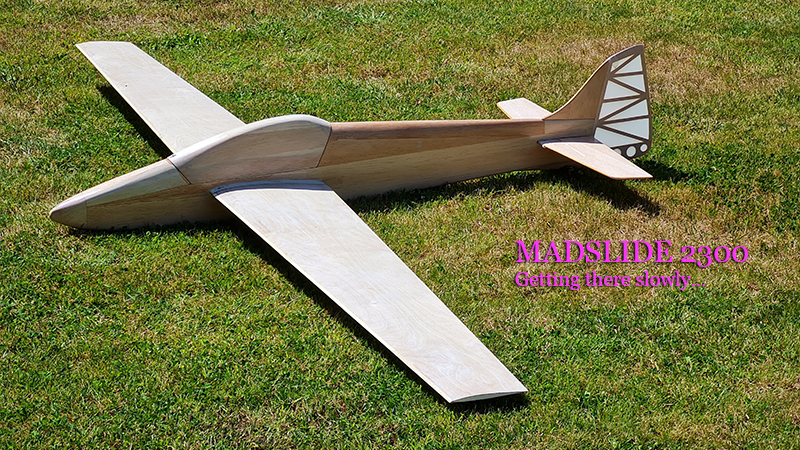 |
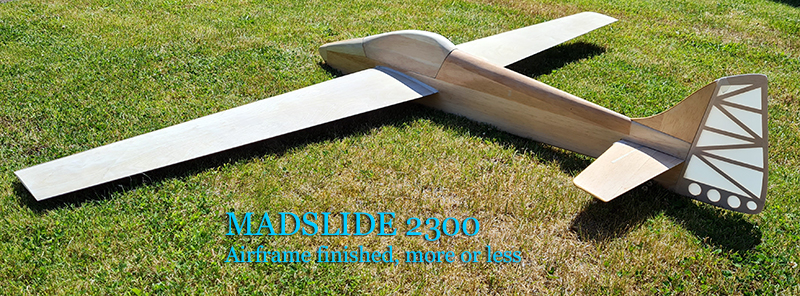 The fuselage is finished, more or less. I covered the rudder in Solartex (like Oratex) and the fuselage has had a coat of clear lacquer. The tailplane fits nicely and you may notice I made a third canopy using just balsa. It's ok but today the canopy latch I fitted rather well just broke! I have to pin-hinge the rudder and paint the canopy and then I'm ready to cut the ailerons and flaps from the wing and face and hinge them. Then is the installation of six servos and their linkages... a job I hate doing! |
|
I had a difficult decision to make with the tailplane as the carbon dowel is glued into both sides of the elevator. This means it is not detachable and as it is over 600mm tip to tip making fitting it in the car rather awkward. I tried to think of ways to make it removable but so far I have no satisfactory method. I thought of using a brass collet with grub screw biting into the carbon rod on one side but I haven't tried it yet. We'll see as the beginning of July 2021 approaches. |
While waiting on a couple things from eBay I noticed an error on the plan! I was about to set up the rudder cables, making holes in the fuselage for them and taking note of the internal bulkheads, when I realised the tailplane in my current setup would be fouled the rudder cables. Fortunately, I managed to get round this problem by cutting the tailplane and modifying the fuselage but it made me realise not to assume anything. |
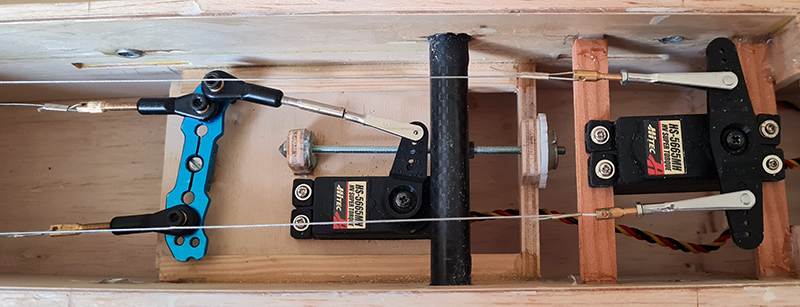
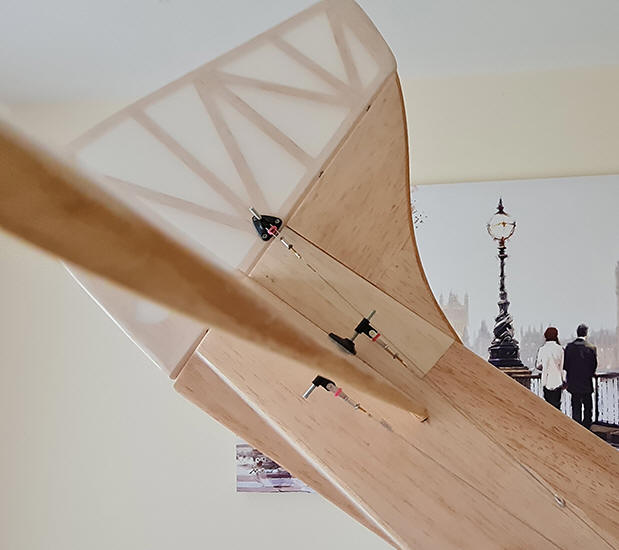
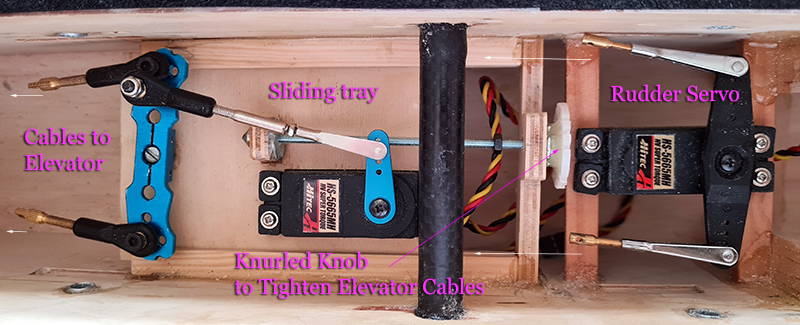 Start of servo installation: Elevator cables are tightened by turning knurled knob (servo and M3 captive nut) connected to sliding tray; about 20mm movement is possible. The servo arms etc. can be altered to suit of course (idea copied from Svolazzo). The large blue bellcrank stops unnecessary strain on servo output gears by tight cabling. |
 Powerful Programmable 10kg-cm, 0.14s HiTec servos for both rudder and elevator. |
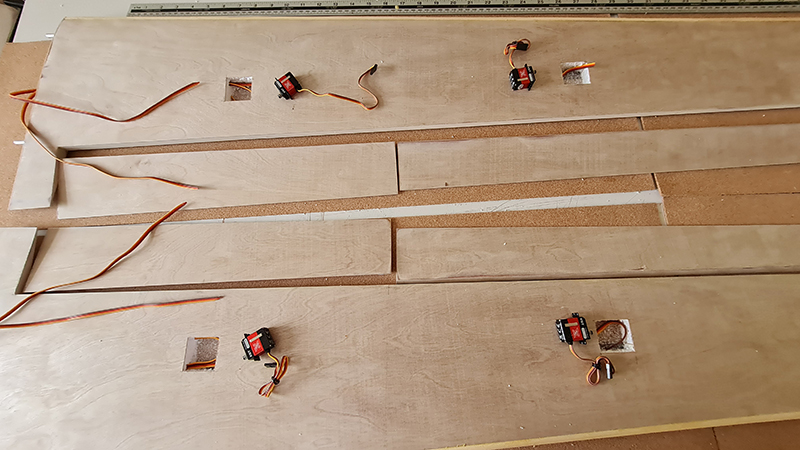 |
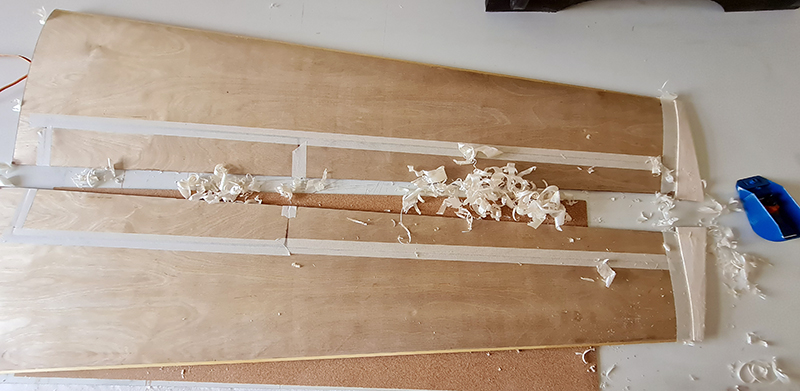
Starting on the unfinished, un-sanded wings, I cut through the 0,4mm ply skin to separate the flaps and ailerons. These were faced with 0,4mm ply. The leading edges still need attention and the tip blocks added. Servo cut-outs done and cables inserted.
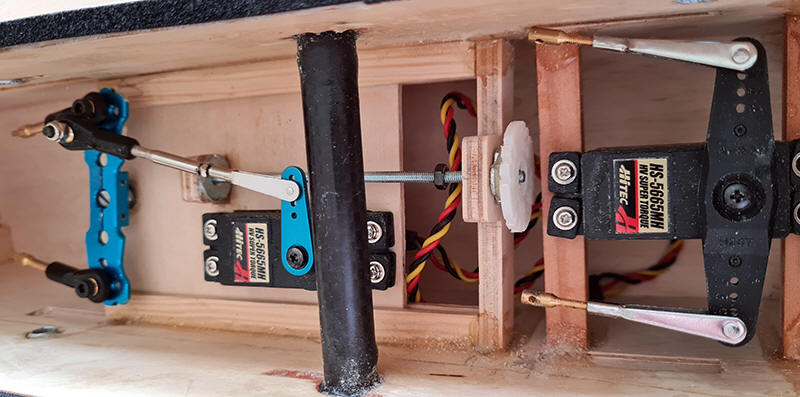
Meanwhile back inside the fuselage, a few changes have been made; I noticed that the 3mm threaded rod for the elevator tightening fouled on the rudder servo. So the rudder servo and its rails was moved up a bit; the pull-pull steel cables for the rudder and elevator have been added as well. |
 The rudder was covered with 'natural' Solartex and hinged with small pin hinges. For the first flights I decided to have the elevator movement confined to a normal 10-15mm up and down and to forego the +/- 90º Mad swing. The rudder moves about 45º either way at the moment - this is a big rudder too! All still need adjusting. |
 |
|
Suffering from 'building fatigue' one again, I decided to print a clear decal/transfer sheet for the MadSlide (mrdecalpaper.com comes highly recommended) as a change from building. Hopefully these decals will roughly match the plum, orange and silver chrome vinyl I have in mind for decoration. |
|
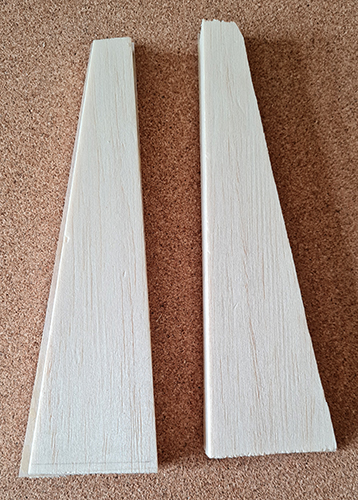 Having fixed the cables and servos in the wings I roughly fashioned a pair of tip blocks from a sandwich of balsa and 0,4mm ply and added them. I also sanded the leading edges of the wings and adjusted the ailerons and flaps to fit. The ailerons are top hinged and the flaps are bottom hinged both with 11mm wide tiny, nylon hinges slotted in just under the ply skins; 16 in all. I shall probably add a hinge of Diamond tape or Blenderm to seal the gap. I created my own aileron and flap horns from glass PCB board. The tip blocks were glued in place and then carved and sanded to fit the tip profile of the wings. They were covered with epoxy resin and given a coat of clear lacquer. I made up the aileron and flaps servo leads with Multiplex 6 pin plugs. |
 |
|
With all the soldering done the next job was to cut the flap and aileron 2mm pushrods with clevises to size before another of my most hated jobs: programming the radio. I'm still using my FrSky Horus S12 but this time I am using a Black Sheep TBS Tracer module and 6 channel receiver on 2.4GHz with its new protocol rather than my TBS Crossfire on 868MHz.
|
Well
the radio installation didn't go according to plan. I had planned to
use a TBS Tracer 2.4GHz receiver but I didn't realise that it had to
be a Revision 43 or later receiver that worked on a 2S Lipo or LiIon
battery rather than a 4 cell NiMh! It tried hard to work and
noticeably got quite hot and then I could smell this strange smell,
Pfft! no Magic Smoke though. Thirty quid up the Swannee! As
it happens I had a Multiplex module to fit my FrSky Horus and a 7
channel receiver so I used that instead, no telemetry but what the
hell.
I also found out that my model needed a lot of noseweight, rather more than I thought so that has come as a blow. Still programming aileron, elevator, snap flap, reflex and thermal flap and then there's the butterfly as well... I hate it. |
 Next
job it aligning the tailplane and fin and getting them square with
the wings. After that comes the servo installations and wires and
setting up the aileron, tailplane and rudder horns and cables. I
absolutely hate this part of any build.
Next
job it aligning the tailplane and fin and getting them square with
the wings. After that comes the servo installations and wires and
setting up the aileron, tailplane and rudder horns and cables. I
absolutely hate this part of any build.