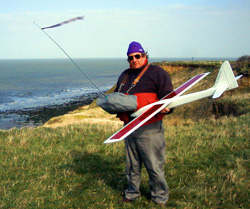
GRAHAM GOES RETRO |
Building a PHASE FOUR |
 "I've had enough carbon and glass fibre for the
time being, I'm going back to building with balsa."
"I've had enough carbon and glass fibre for the
time being, I'm going back to building with balsa." That's what I thought to myself when remembering a time 25 years ago when I saw the best slope flier I ever saw. The only thing I knew about this chap was that his name was Carl and his father owned a model shop. His model was built-up balsa and covered in tissue (or nylon) and dope. It must have had flaps because I remember it doing tight square bunts and loops on the very front of the slope. Neither bunt nor loop was better than the other so I assume the model had a symmetrical section.
A contemporary of this slope pilot was Chris Foss; indeed, they flew at the same slope from time to time, so what better than to build one of those models from that era. I knew Chris Foss' Phase 5, my brother had had one, but that was later than the Phase Four. I phoned Chris Foss and ordered a plan for the Phase 4 for £8. A plan from a quarter of a century ago - the date reads 1975!
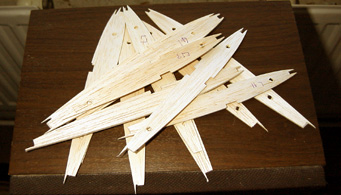
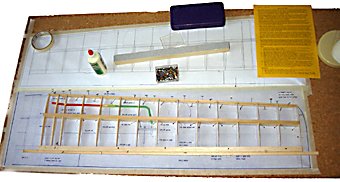
Now I have to recall all those building skills from 25 years ago. Just how do you cut 28 wing ribs from drawings of a root and tip rib? What about the bulkheads. And then there's all those shavings and sawdust. But first, having just moved to a new house with no workshop and no nearby model shop, there were a few things to do...
| First step - the plan - contact Chris Foss : this was accomplished easily enough - a postal order for £8 chez Foss. (no cheques apparently) | |
| Second Step - buy some mail order balsa and things from Balsa Cabin & Inwood Model Supplies : I was worried about the quality of the balsa but I needn't have been - it was very good. | |
| Third step - find something to build on : I opted fro a piece of MDF, stiffened with wooden battens and covered with cork tiles. |
 Specification
| Span: 67 inches | |
| Weight: 2½ lbs (hopefully) | |
| Functions: Ailerons, Coupled Elevator Snap Flaps, Elevator, Rudder | |
| Loading: ca. 10 oz/sq.ft |
| Profile: 10% Symmetrical section |
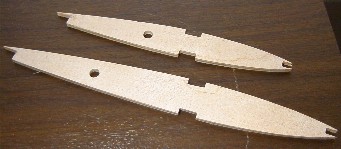
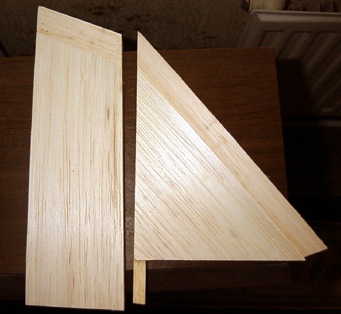
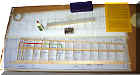
This was relatively easy. If you don't know how to do it... mark off, from the plan, the root and tip ribs using either carbon paper or a pin and cut them from ply. I used 1/8th ply but this was a mistake, I should have used 1/16th. Next cut all the blank pieces of 1/16th balsa for a wing panel and then bolt them all together. Set to work with a plane and sanding block. Do this for each panel. Finally pair up the ribs from each panel and make sure they match. We do not want different panels on each side, do we?
Click my Ricoh digital thumbnails for larger images...
|
|
|
|
|
|
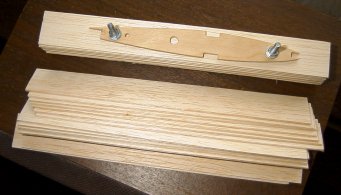
Rib sandwich | Rib stack sanded to shape | Et Voila! Ribs |
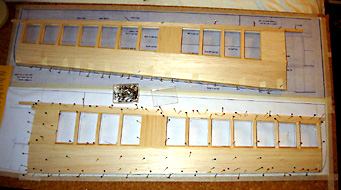
All straight forward except that I did make a mistake with the trailing edge. See image. Gosh! Did my thumb hurt after pushing in all those pins! I used Aliphatic glue (the yellow one) by the way. Keep the wing flat after joining. Dictionaries and 1kg packets of sugar come in handy here.

Wing Lay-up Aagh! First error Sheeting top & bottom Joining wing panels
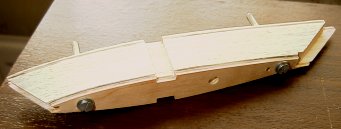
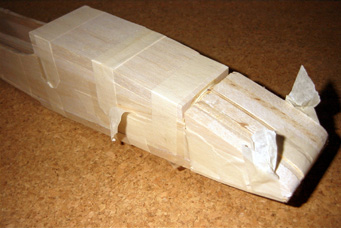
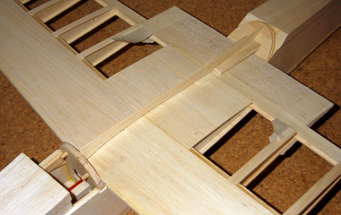
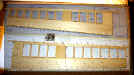
Make a good job of the bulkheads. I didn't vary their size even though receivers and servos are smaller 25 years on. (Old guys - the plan has space for a DEAC battery marked!) They are cut from 1/8th, 1/16th ply and balsa. Sand the bulkheads joined by wood dowels (canopy & wing) together. Blocking up the fuselage from light balsa is easy. If you have a fuselage jig, so much the better, otherwise build up over the plan. We want a straight fuselage BTW.
|
|
|
|
|
| 9 bulkheads | Blocked up nose! | Fuselage in the making |
Ready for planing & sanding |
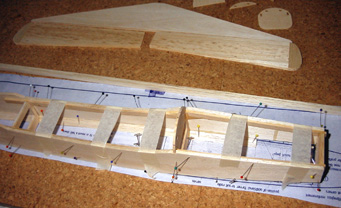
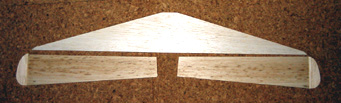
Surprisingly, the tailplane, fin, rudder and over-wing fairing
are built up from balsa pieces; to keep the model light I suppose. The elevators
are sanded from 1/4" balsa. (I made the rudder slightly taller than on the
plan.) The wing fairing was a pain to do. I think there were 10 pieces of carved
strip balsa but I got there in the end. Some Fine Surface Polyfilla
filling was needed here.
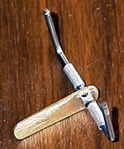
I couldn't find an elevator horn (although they were available in shops years
ago) so I made one with materials to hand. I had aluminium tubing and piano wire
(14 gauge). For the horn I used part of a brass radiator key and part of an
electrical terminal block soldered together. Quite neat, I thought.
|
|
|
|
|
| Built-up tail |
Built-up stab & Elevators |
Wing fairing |
Elevator horn |
 Well,
all those years ago, the original model, was covered in tissue and dope for the
wings and nylon/dope for the fuselage. I couldn't face the smell of the dope in
the house and opted for Litespan but then at the last moment changed my mind
after worrying about its shrinkage properties; I used Solarfilm instead. For me,
covering is a pain so it took quite a while to finish.
Well,
all those years ago, the original model, was covered in tissue and dope for the
wings and nylon/dope for the fuselage. I couldn't face the smell of the dope in
the house and opted for Litespan but then at the last moment changed my mind
after worrying about its shrinkage properties; I used Solarfilm instead. For me,
covering is a pain so it took quite a while to finish.
'Twas a bit chilly (~10ºC) and not a very good SW wind for my very first flight at Cherry Hill, overlooking the Folkestone Chunnel terminal. Still, it flew, and my first impression was that it was so s-l-o-w compared to my other sport models. After a couple of flights though, I decided P4 had distinct aerobatic possibilities flying accurate manouevres. The roll was more axial than I'm used to, 4 points were crisp but best of all was the bunt. Just push down elevator at normal flying speed and round the Phase 4 goes. In fact, rather than dropping out of the outside loop as most models do in the last quarter of the loop, it actually snaps round to the horizontal. The regular loop was less impressive for some reason I've yet to discover. It wasn't a good day weatherwise but P4 has promise. It needs some fiddling with the movements and CG but I'm looking forward to getting some accurate flying done. I'm even considering a composite version of my own along the same lines: Lost foam fuse and glass wings. It was worth going retro, I reckon. Most of my flying these days seems to be fast, furious and fearsome. Flying retro takes me back to a gentler kind of flying. Whoops, I must be getting old... |
Bishopstone
cliff (aka Beltinge)
|
 END
END