|
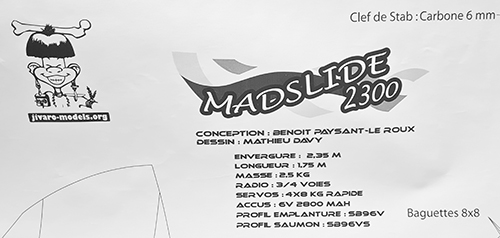
MADSLIDE - 2300 - part II [a.k.a. DARK MATTER] This is my new model driven by the unseen forces Gravity, Electricity, Magnetism and Solar Radiation |
|
|
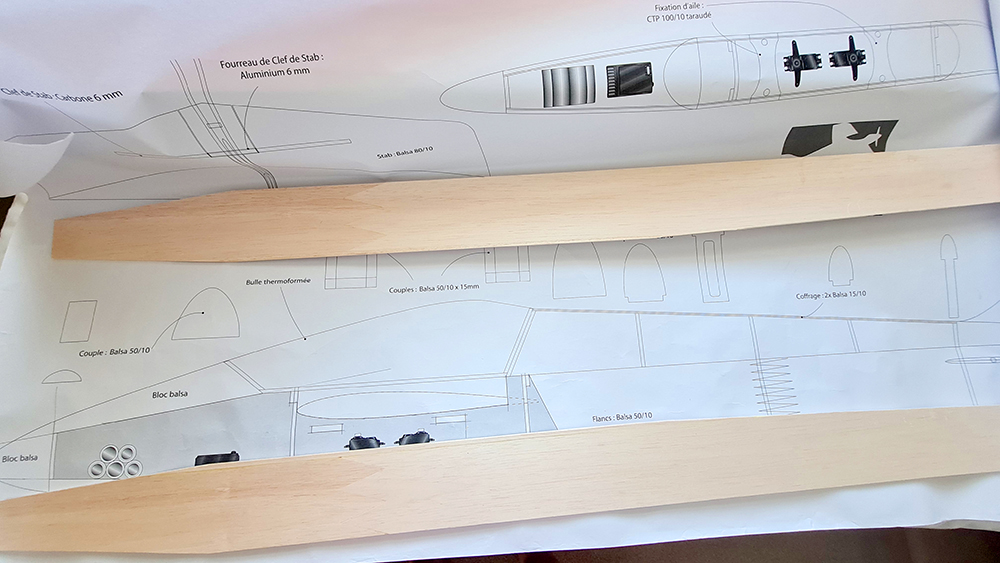
So, it's now the beginning of May, a bank holiday weekend, and I just started to make the fuselage of the MadSlide 2300. It's quite long so I had to splice pieces of 5mm balsa together to get the length. I then had to cut out a few bulkheads. The fuselage is really just a box, the coving behind the canopy is 2 pieces of rolled 1.5mm balsa to get the round shape and the rest is made from 5mm balsa, ply doublers and block balsa. The canopy will be made from glass fibre draped over a blue foam form carved and sanded by me from a blue foam block as in my original MadSlide 1500. I have made a departure from the plan in that the wing is in 2 pieces rather than a 2.4m one piece wing shown on the plan. This means a 10mm carbon wing dowel through the fuselage rather than the traditional ply plates and nylon bolts method. This is just for convenience. My tailplane will also be removable rather than fixed for the same reason although this does create more problems which I haven't quite worked out yet. I decided to get on with the fuselage and canopy in any case while I think about that problem and the +/-90º elevator movement... should I use pulleys or a long servo arm as per plan. |
|
|
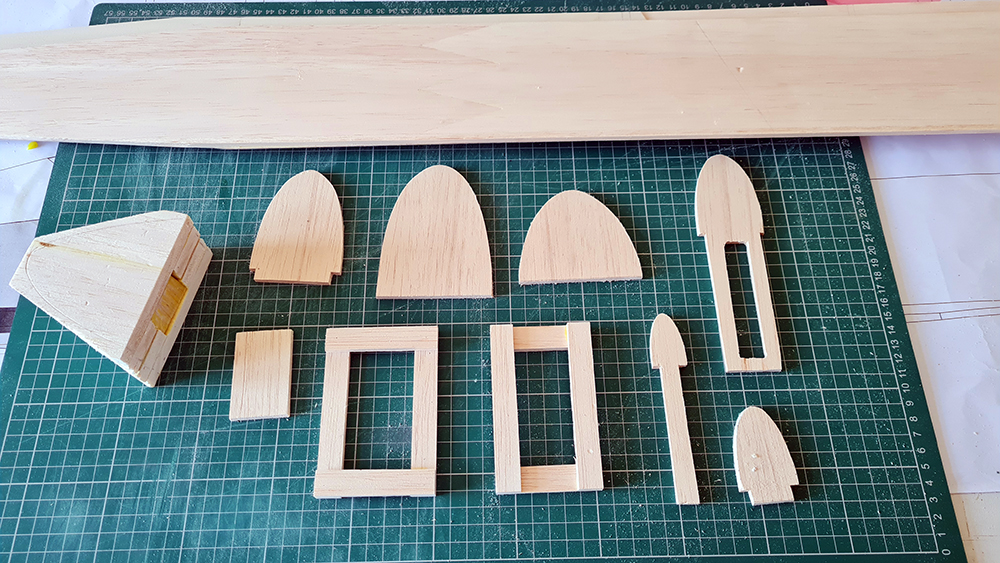
I created the noseblock from a central piece of 1.5mm ply and 4 pieces of 10mm balsa. I hollowed out some of the noseblock and added some lead (~170g) as I know this model will need noseweight since the original model uses 5 sub-C NiCads and I shall be using lighter LiPoly or Li Ion cells.
|
 Fuselage sides are taped together with two bulkheads to add a memory to the balsa sides, with 1.5mm ply doublers now glued in place, when the time comes to glue all the parts together with the 5mm balsa bulkheads in place. The fuselage will eventually just have a wood finish by covering with a lightweight glass (25 or 50gdm-2) and epoxy resin with a final coat of clear lacquer. I have some orange, purple and silver chrome vinyl for embellishment. (I have to imagine the finished design and colours before I can make it... weird eh? |
|
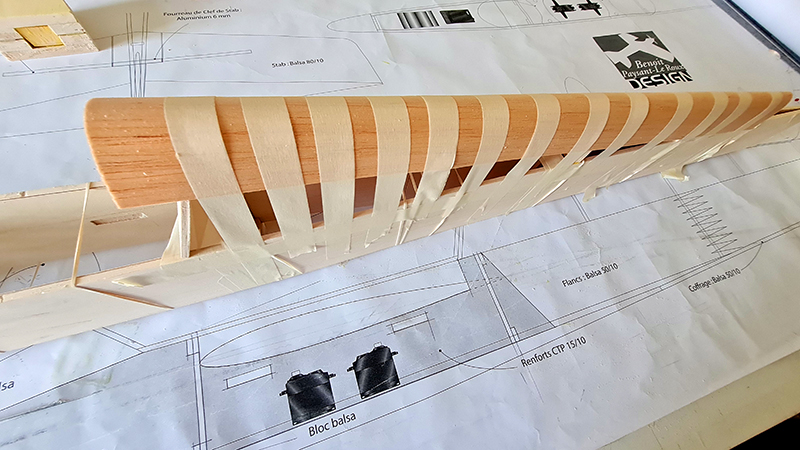
On drying out, the 1.5mm balsa takes on the curve so that the balsa does not split when bent in such a tight curve. (The leading edges of foam wings can be made in this way.) Using two pieces of wood makes it quite strong as it is effectively a laminate (wood/glue/wood). A piece of sheet would not go around a tight curve like this. It is a lot of work, the alternative would be a piece of white foam covered in obechi or 1.5mm balsa. The side gaps are easier because the curve is gentle and the balsa sheet can cope with it; a second layer made in the same way is added afterwards. |
 |
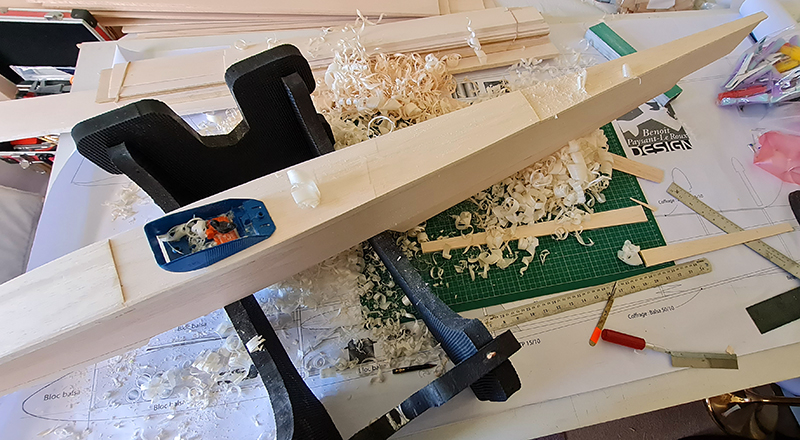 |
The
curved coving went well, better than expected, (see image left of
the rear). I added the extra balsa sheets for the top and bottom,
glued on the noseblock (with internal 170g noseweight) and set about
carving with a razor plane - the best part of building! N.B. My
messy work bench and those lovely shavings.
The fuselage, after roughly carving to shape, came out about 550g (plus 170g noseweight) and 90mm wide and ~220mm high at the canopy - that's a lot of balsa and aliphatic glue. It is a large fuselage measuring 1500mm in length in this wide angle photo without the rudder. Next step is the canopy carved from extruded foam to create a form then that used as a mould for a fibreglass canopy to be fitted in a balsa frame. A built-up rudder is then the next thing I shall make. |
|
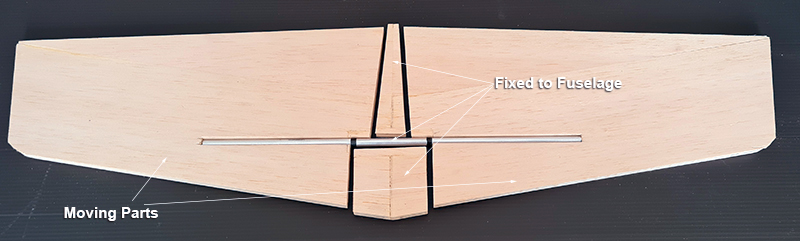
The
large elevator is cut from a 100mm sheet of 8mm balsa . It is a
fixed tailplane which is not ideal IMHO. The joiner is a 6mm carbon
rod in an aluminium tube (all from Lindinger in Austria where I got
all the millimetre size balsa sheet). The carbon rod should be glued
into the tubes on each half of the stab according to the plan. The
rod rotates on the 60mm wide central tube attached to the fuselage.
I don't like this arrangement, I must say. I may make the tailplane halves detachable by using wheel collets at each end of the carbon rod, I have a pair on order, but this isn't ideal either. Large aileron horns are attached to the top and bottom for the closed loop drive cables. |
 The huge bellcrank is there to provide a large movement, I am using a powerful servo btw. The elevator cables are a closed system that do not put a strain on the servo spline and gears, the bellcrank has two ball races to make sure it moves freely so the elevator can centre easily. The servo rail channels, cut down to size, would be glued to the inner fuselage sides. |
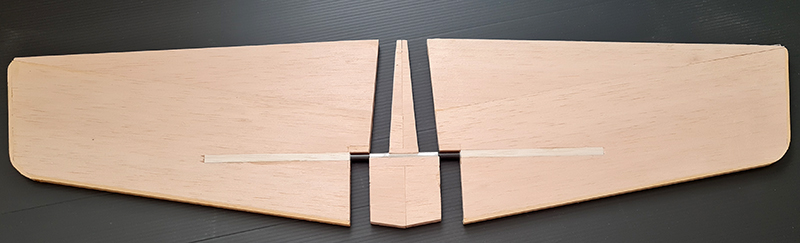
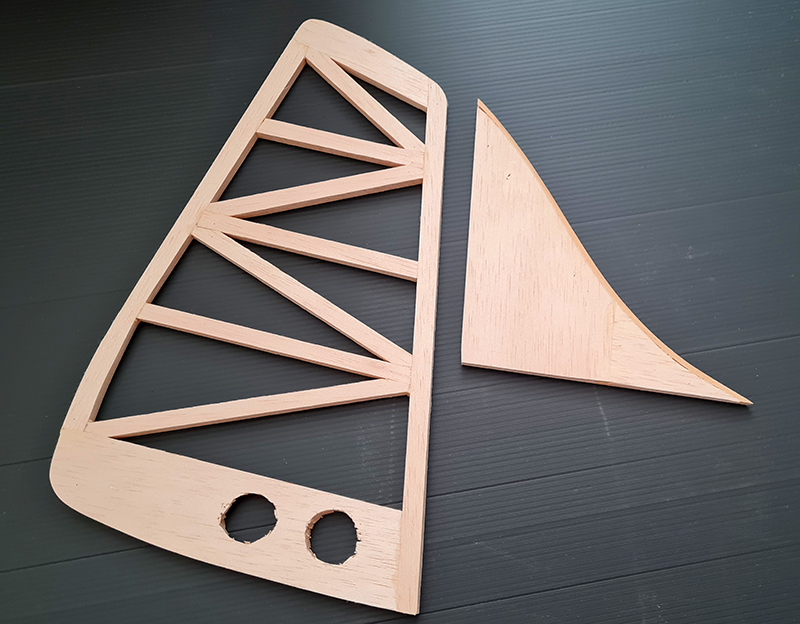  The rudder will be covered in Chrome Vinyl film. The fin is cut from the same 8mm, 100mm wide balsa sheet. The rudder is built up from pieces of 8mm thick balsa, 10mm wide. I need to add a couple more lightening holes; this too needs to be sanded down to some sort of profile. |
A 6mm aluminium carbon joiner in its tubes provide the +/- 90º stab with its pivot. The tailplane here has not yet been sanded down to an airfoil profile but I added an obechi strip to the leading edges for a bit more ruggedness and stiffness, likewise the fin on the left.
|
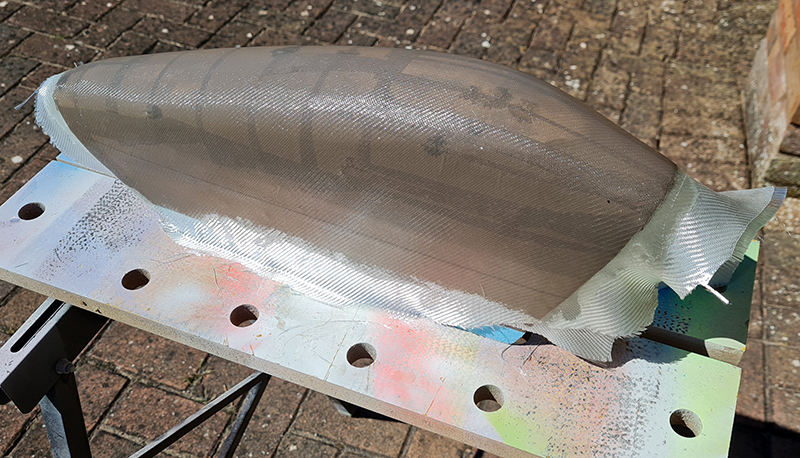
| So next was the canopy. I marked the rough shape on a block of foam and started on it with a saw, some blades, especially a bread knife, and sandpaper. Eventually I got there and wrapped it in parcel tape but it wasn't so good. A little too small, anyway I made a canopy to see the fit and it's not quite there so I have to make another. That's two pieces of 105gsm twill and 30ml of resin and an afternoon wasted but hey ho. | |
I
 |
 |
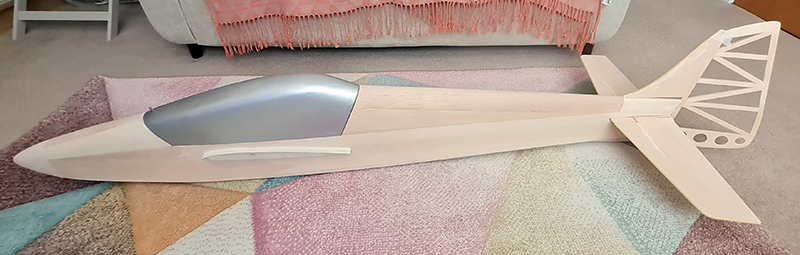
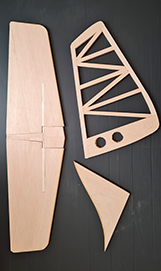
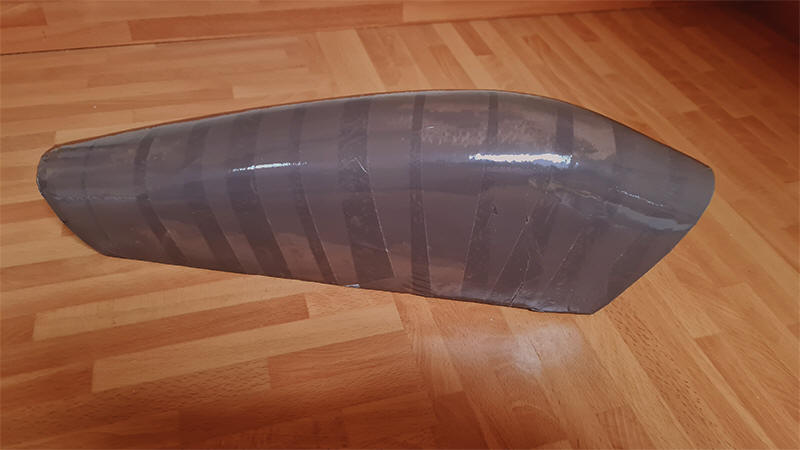 Not very well wrapped, I have to do it again but you can see the roughed out canopy form and a poor canopy on the fuselage on the left. Wing joiner carbon tube and aluminium locating lugs and side cheeks/wing roots have be added as well. Made a canopy frame as well. |
However, I have to start over on the canopy as I said.
Re-wrapped with tape, canopy #2 is slightly larger.
|
|
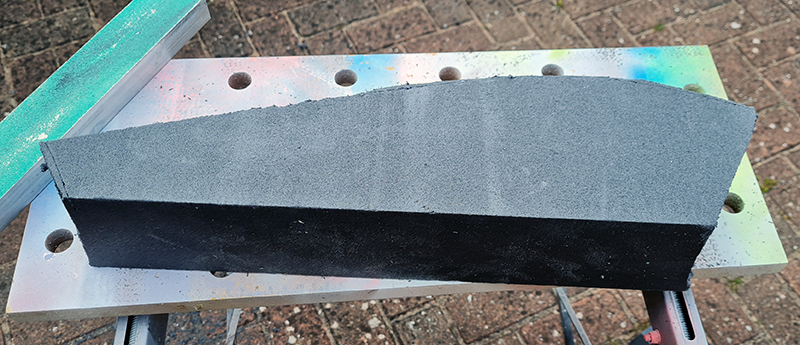
Airframe sanded down, ready for a layer of 25gsm glass and epoxy resin. |
|
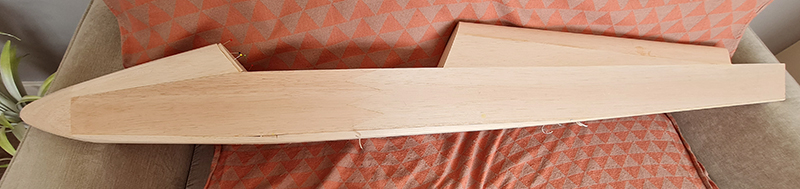
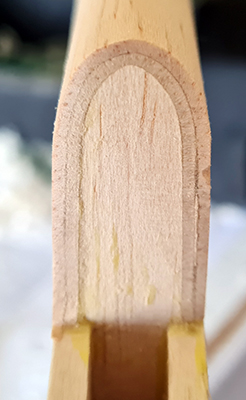 The
curved coving behind the wing is made from two pieces of 1.5mm balsa
separately. The balsa is first soaked in hot water in the bath and
then draped over the bulkheads, used as formers, and held in
position with masking tape on the sides of the dry fuselage. The
balsa looks orange here because it is still damp/wet. No gluing is
taking place yet; this is just to get the curve.
The
curved coving behind the wing is made from two pieces of 1.5mm balsa
separately. The balsa is first soaked in hot water in the bath and
then draped over the bulkheads, used as formers, and held in
position with masking tape on the sides of the dry fuselage. The
balsa looks orange here because it is still damp/wet. No gluing is
taking place yet; this is just to get the curve.