|
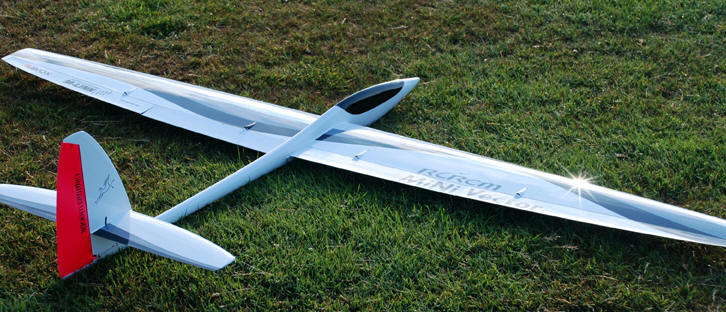
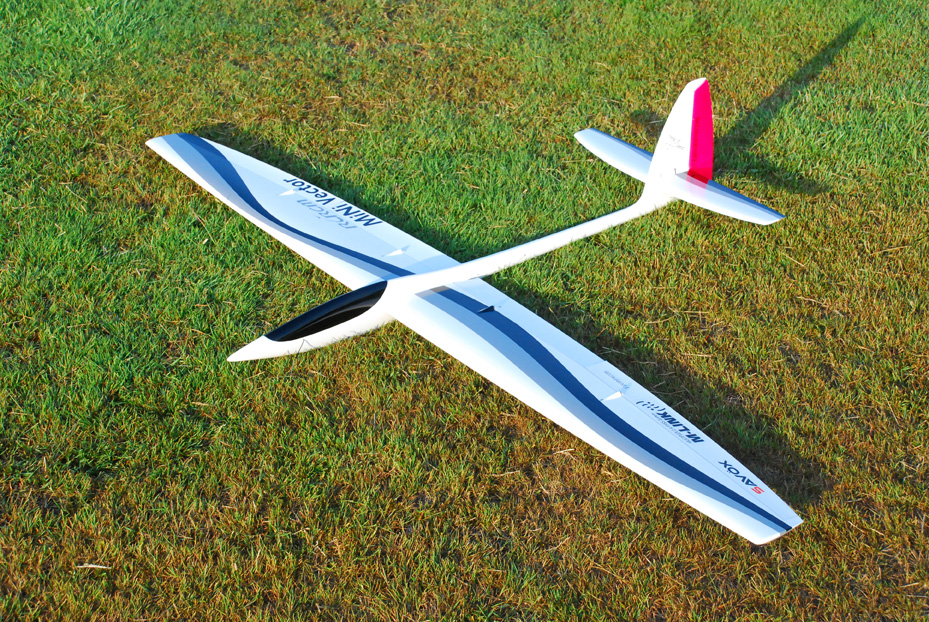
THE MINIVECTOR
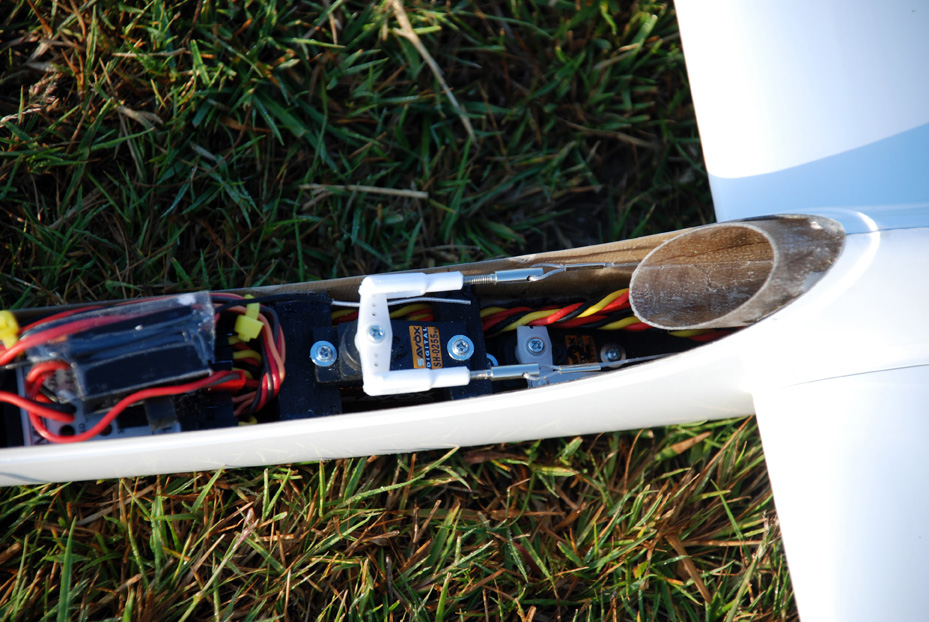
My Minivec was a pain to put together. I used the recommended Savox,
metal gear, digital wing servos but had to cut the lugs off them to
fit them in the correct place for the aileron and flap horns, the servos don't go where you think they ought so the
holes in the shrouds consequently didn't fit, I had to make some
others.
I also ripped out the stiff-ish elevator and rudder snakes and
replaced them with a carbon elevator pushrod and a closed loop rudder. The
elevator servo must touch the bottom of the fuselage if you do this
modification although it is difficult to do (getting the elevator
horn clevis in place requires cutting into the fuselage/rudder post. Oh yes,
having cut it off, I made the rudder larger too (but mine shown were still needs to be even bigger).
It was difficult to fit all this stuff in the narrow fuselage (a model feature pioneered by brother David in his 80s
Aeolus). The enormous ballast tube in the fuselage is overkill but apparently one
must use it as it seems to be part of the fuselage design.
I'm still worried about 4 instead of 5 Intellect NiMH cells running six digital
servos though, if I can get them to fit I might try Eneloops. Looks nice, the surface finish is
excellent, everything fits (except the
wing servos on my version); the mega, square carbon dowel only needed
the lightest of sanding. The tail fits well. The canopy is cut to a
nearly perfect fit and is not carbon. As I said earlier the snakes
were stiff. It needed a piece of moulded lead
in the nose plus some extra (see image left). The use of the
'Multiplex' green plugs and sockets means the model goes together
really quickly on the slope, holding the wings on with tape however
is a problem—there's not much room on the wing fairings for sticky
tape. Wings—trouble is, I'm not sure what the wings are like
inside; David tells me they're not too hot after seeing the insides
of his after replacing two busted
wing panels which sprang apart in a crash and later mid-air.
It flies beautifully but... not for the beginner though, use full ballast and I reckon you'll wreck it no time. Lovely plane now I've fiddled with it. Update August 2011—Had a little prang—landed flat on the slope with a bang—fuselage split open and cracked —damaged the wing root too—luckily it went back together, more or less, with a little cyano. See another Minivec video at www.vimeo.com/21365904 Get it from www.sloperacer.co.uk |
Click this image for a short headcam video using Keyring Camera #11
|