It's been a long wait but my brother David finally
got his hands on one of these mischievous creatures after waiting
over a year ;-) for one to appear. Having had a couple of Mini-Vectors, a pair of
Aresti 2Ms
and an Aresti 108he was looking forward to this lightweight VTPR (sic)
from the same manufacturer but more of that later. There are, of
course, pros and cons to this new model. I found a few niggles but
overall the quality of the build is better than expected. The model
feels very strong, too strong in fact, it will be a toughie
and I reckon it will survive the hardest landings.
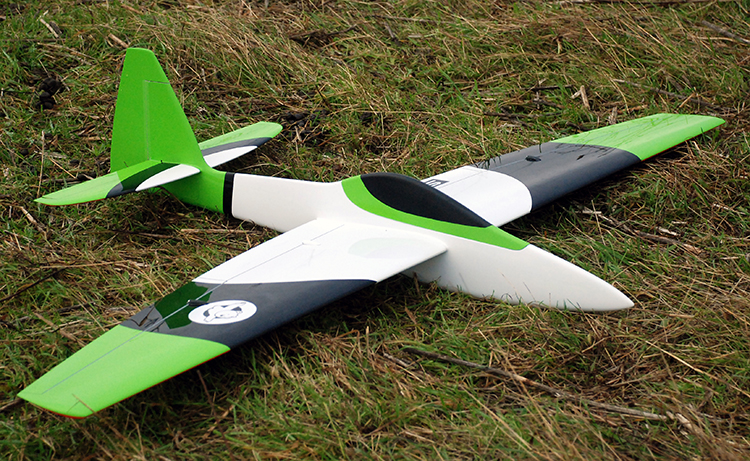
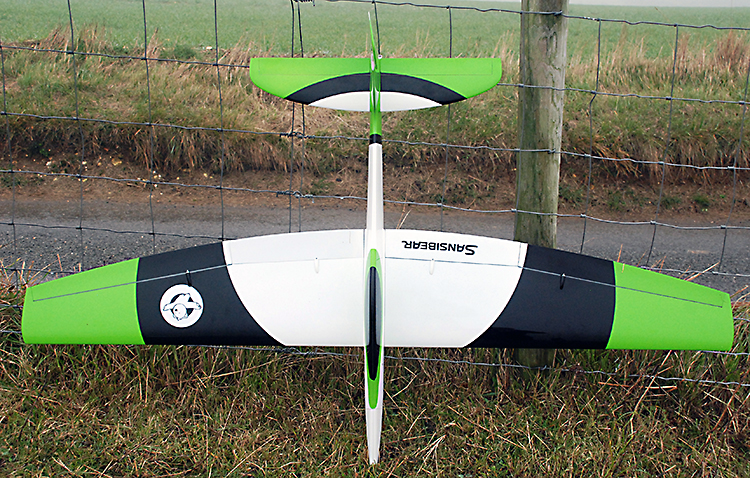
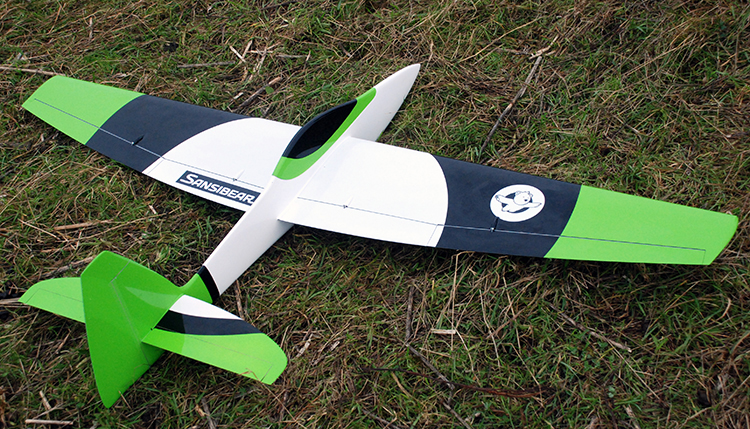
I'll begin on a positive note and say that the
quality of this all moulded slope soarer is excellent. The place to
look is at the join lines where the halves of wings and fuselage are
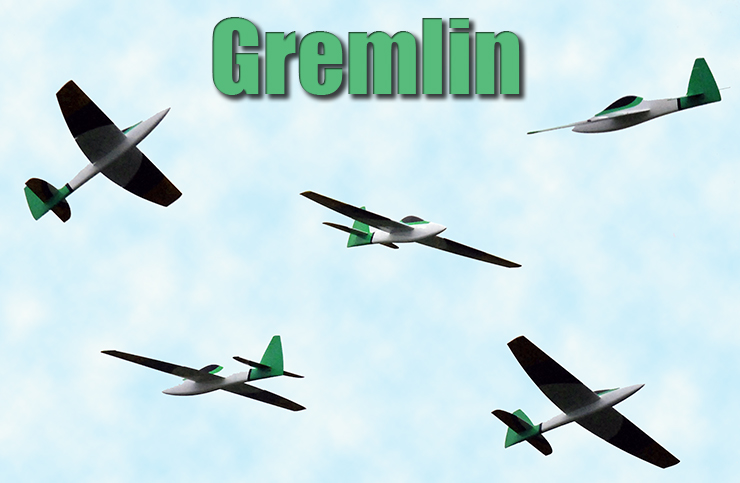
united. This paint design in green, white and black for the top and
red, white and black for the bottom is by Sansibear, I
believe, and its paint lines were very good with a tiny amount of
overspray in just a couple of places. A much better build than other
models from this stable with the exception of the Czech built
big Aresti 108 IMHO.
FUSELAGE,
FIN AND RUDDER
(Click on Thumbnails for larger images)
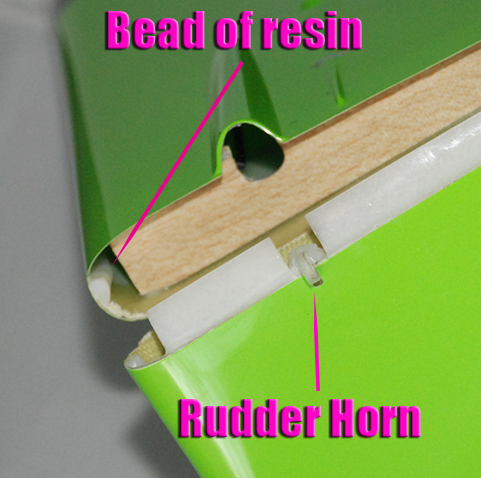
The
overlap joint in the fuselage is excellent and there's even an extra
bead of resin and microballoons or thixotrope? at the base of the fin, on the join line,
where many fuselages can split on a heavy landing, nice touch. There
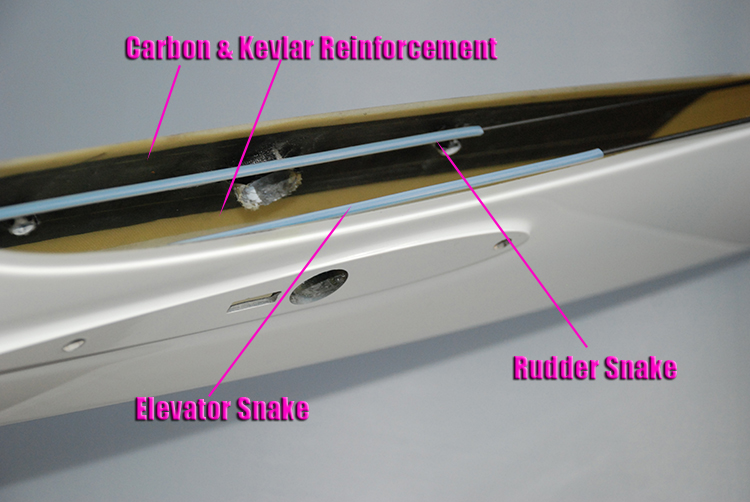
is Kevlar and carbon around the wing root inside the fuselage but
saying this is 2.4 GHz friendly with slabs of carbon exactly where
the receiver and its antennas are likely to be placed is doubtful.
However, this model is likely to be flown 'close in' to the slope,
and therefore at close range, so I'm probably nit-picking here. The
fin is reinforced internally with a wood 'spar' and the rudder post.
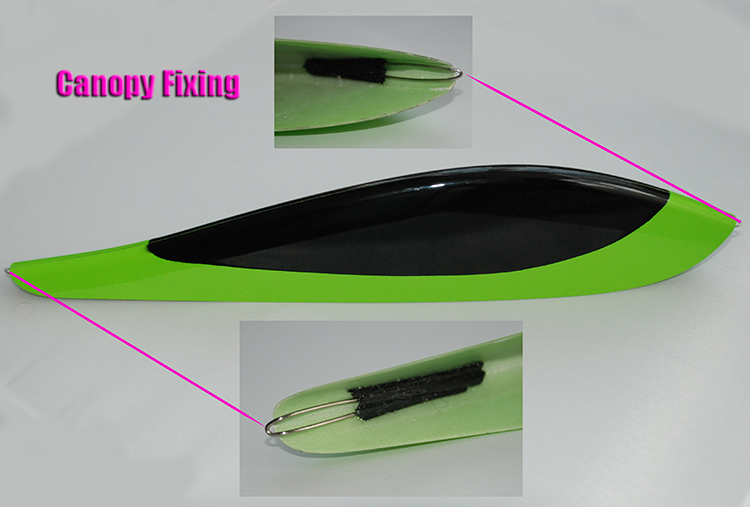
The
canopy comes with ready fixed spring wire catches and is a very good
fit. The actual shape of the fuselage is kind of triangular in cross
section, tapering slightly from bottom to top and it has a pleasing
curve along its length, i.e. it is not straight and slab sided,
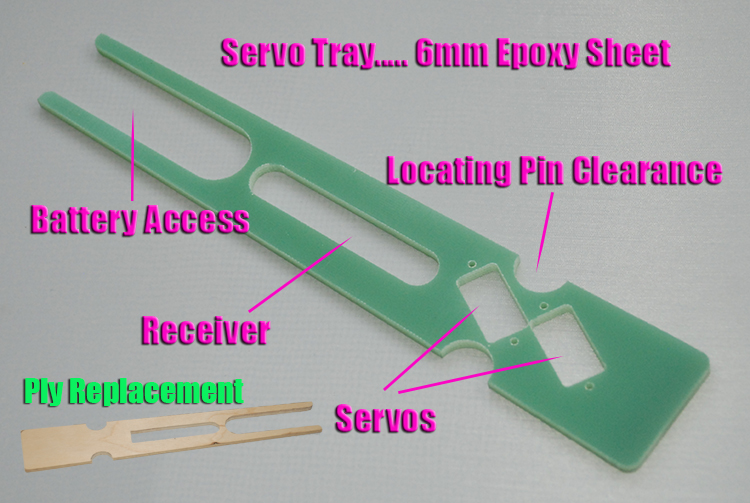
almost aerofoil in shape. (See noseweight image below.) The servo tray
supplied is of 4mm thick epoxy sheet (overkill) coming in at 37g!
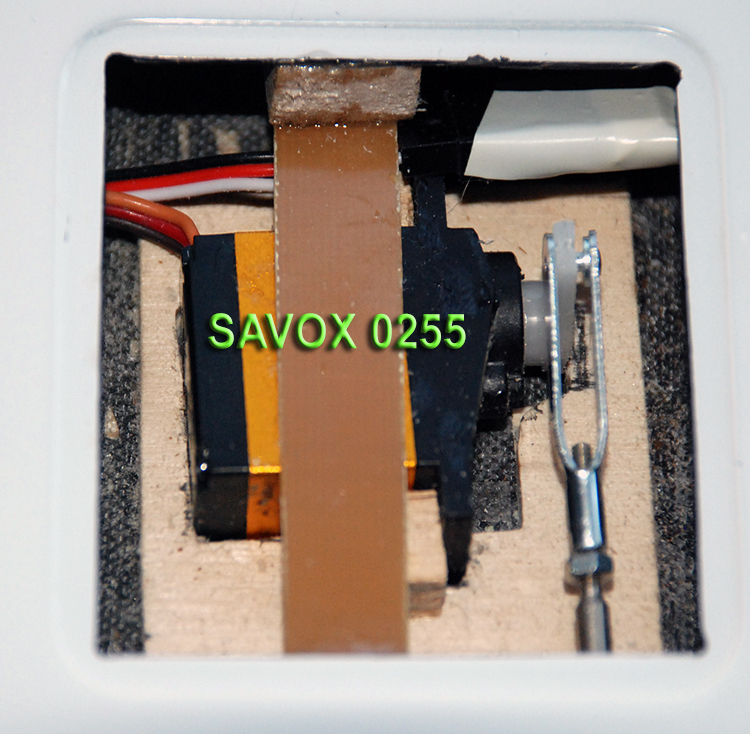
This was found to be unsuitable for the
Savox 0255 rudder servo used for the
rudder so it was replaced with a 6mm plywood facsimile weighing in
at just 20g.
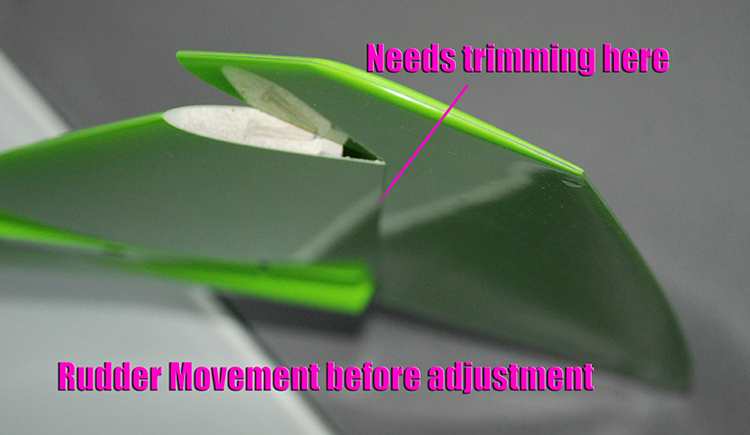
The
moulded rudder was a bit problematic as the movement on the
non-hinged (left) side of the rudder was limited and about 3mm of
material had to be removed from the fin here to get adequate
movement; 45°+ either direction was achieved. The wiper for the
rudder also had to be cut back for the same reason. Working on the
model, figuring out how to do the elevator servo mounting (argh!)
meant a lot of unintended stress and movement came upon the rudder
and the Kevlar hinge of the rudder began to fail/suffer. It needed
taping to keep it from falling off. The rudder hinge doesn't use any
of the peel ply tape that is sometimes used for surface hinges in
moulded models. The rudder hinge, therefore, needed some remedial
action to ensure its reliability before flight testing. In fact,
Blenderm tape
was used on both sides for the rudder hinge.
TAILPLANE/ELEVATOR
Well
I'm afraid to say that I reckon the designer was a bit schizophrenic
in his thinking about the Gremlin elevator. I say
schizophrenic because his two (or three) ideas of elevator servo
mounting and elevator operation are contradictory or incompatible
with what one is given in the 'kit'. Trying to make it dual purpose doesn't
really work.
There is a snake installed for the elevator but no bellcrank was
included in the 'bits bag' nor mounted in the fuselage; there is an
access hatch cut in the fuselage, presumably to access such an
elevator servo bellcrank but this is no use for a fin mounted servo.
The supplied epoxy servo tray has elevator (and rudder) servo holes
cut ready to take a 9gm servos though.
However, it has been suggested that the Gremlin can use an
elevator servo in the fin but in this case said hatch is in the
wrong place and any ready installed bellcrank would have been in the
way. Someone is trying to have their cake and eat it at the same
time! It's a distasteful cake too because neither method is
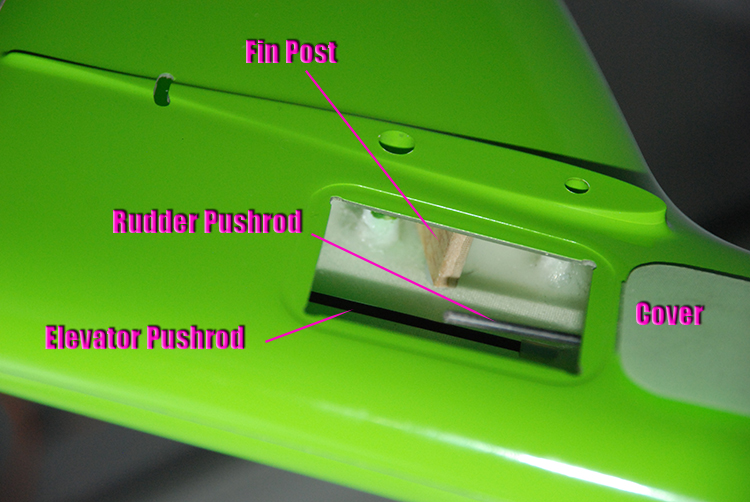
satisfactory. After much musing my brother David decided a servo at
the rear was the better option but how exactly to accomplish this
was a struggle. In the end, the rudder post was cut away to allow
the KST H08
elevator servo in a small, thin ply tray to be glued with 5min epoxy
(so it would be easy to remove) through the
rear of the fuselage a at the rudder post to one side of the
fuselage, part of the rudder post was removed to achieve this
access. The hatch here is now pretty much redundant because a servo
cannot be mounted in the fin through this hatch. A direct link from
the servo to the elevator actuating wire is rigid and slop free,
albeit using only a fraction of the servo's movement to get
something like the 6-7mm up/down elevator movement David reckoned on
using. (The ply servo tray in the fin can come loose on a heavy
landing so beware!) I say this because it did!
Getting
back to the bellcrank idea, a little thought shows that the geometry
on any installed bellcrank would be wrong as the servo movement on a
servo mounted on the servo tray would have to be minuscule given the
position where the elevator snake exits at the rear so this is wrong
too. On the other hand, it has been suggested that the elevator/stab
combo could be modified to become an all-moving tailplane (rather
than a fixed stab plus elevator) with a bellcrank to facilitate the
Gremlin as a VTPR
model with a mega tail movement. Getting a +\- 90° stab movement à
la Cahour, BPLR
etc. or Henderson
pulley may be possible, I don't know, that's something we've
never done.
A
bellcrank would work but the actuating wire slot would have to be
enlarged considerably and the moving elevator actually glued to the
fixed stabiliser. Making the elevator joiner wobble and slop free
would be a hard task I might add. The exit shroud for the rudder
would have to removed as well leaving a gaping hole/slot in the fin.
Confused? We certainly were! It's your choice. In any case, I have
included images here so you can see David's servo-in-fin solution
for yourself. This is how it was accomplished on this model, you may
opt to do it a completely different way.
No instruction is given and saying it is adaptable is simply not on
a small, expensive 500 Euro mouldie... you could in fact say this
about any model.
To be honest, I personally see no merit in
having a separate elevator and stab and fin mounted servo. On this
model the distance between the actuating joiner and hinge line is
just 8.5mm. This means close-in hole on the servo arm actually only
using a fraction of the servo's movement, effectively not using the
full servo resolution.
NOSEWEIGHT
From
the look of the Gremlinat first sight it seems that it has a long nose moment, and it
does, but the rather heavy tailplane (actually 5g heavier the the 2
metre Aresti) means
adding a lot of noseweight to balance. To this end a piece of lead
was cast to exactly fit in the nose. The piece of lead to
approximately balance the model on the wing joiner for the initial
flight was 218g bringing the all-up-weight to 1700+g and a wing
loading of over 20z/ft). In comparison, David's two Aresti 2Ms had
approximately 20 ounce loadings and the 'big' Aresti 108, a 17.5
ounce loading. The battery chosen for the Gremlin was a set
of four Eneloop Pro cells. Originally the model had been
fitted with a 2200mAh 2S Lipo but this was changed when the High
Voltage KSTs were removed.
WINGS
After
the drama of the stab/elevator and its fixing, the wings were
relatively easy. Four servos with straight push roadsto the flying surfaces and little homemade
ply trays to hold the KSTH08
wing servos in place. We thought that the aileron servo well holes
were not quite in the correct in orientation and place, btw. Even
the wing servo mounting was problematic since lightweight servos
were chosen as this was supposed to be a light model. After a heavy
landing and a pair of stripped aileron servos all the KST
wing servos were replaced with Savox 0255s.
The
quality of the wings is mostly good too, apparently with plenty of
internal carbon to go with the Sine Wave shear web incorporated in
this model which one can espy from the servo wells. The wings appear
very strong and torsionally rigid, too much perhaps, therefore very
resistant to any bending or twisting force you can apply with your
hands. While the wings are maybe over strong for such a small model,
the hollow 330mm
carbon wing joiner (18mm dia. int. 15mm) tube may appear too weak
for its job, we'll see, especially if any ballast (650g/23.2oz) is
fitted in said tube as suggested. Because of the tight fit of said
tube, I doubt an Pitcheron/Wingeron system would be possible without
extensive engineering and ball races to prevent binding in tight
turns.
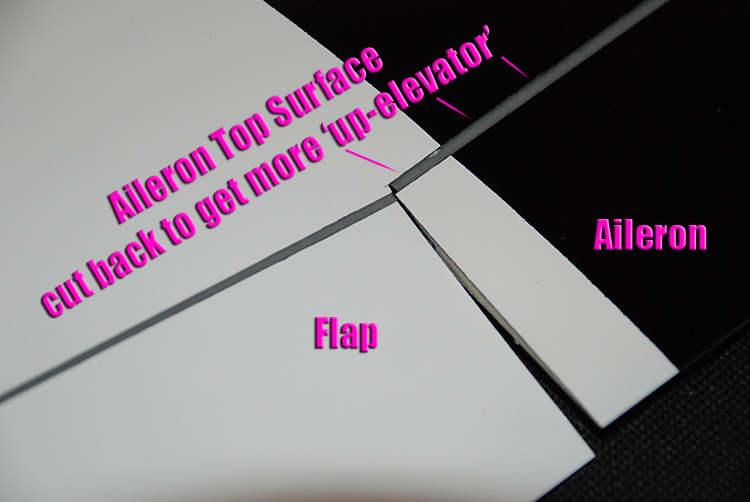
Like
the rudder, we both like lots of control surface movement, on the
Gremlin the need was
felt necessary to increase the up-aileron movement; being bottom
hinged, about 1.5mm of the top wing surfaces (where the ailerons
are) was removed to get the necessary throw. More work on a moulded
model! The panels have stub aluminium dowels for wing alignment but
no thought appears to have been given to holding the wings on the
fuselage. The traditional tape method is not really an option as the
fuselage hardly has adequate wing fairings on which to stick tape.
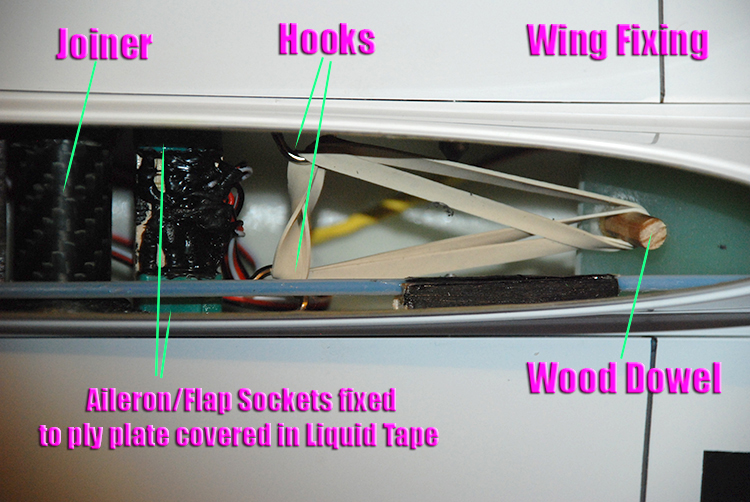
Falling
back on the rubber band/spring and hook system needs the wing roots
being reinforced inside the wing roots with ply to take small hooks
as the wing root faces are paper thin. The narrow fuselage makes
this awkward though. The aileron and flap horns come ready fixed,
they are substantial and pre-drilled. The pushrod exits needed to be
opened up to take the clevises used on this model. The wing horns
come with exit shrouds and the servo wells have their covers which
fit nicely. All in all quite a nice pair of unfinished wings with a
straight leading edge.
VTPR
(Voltige Très Près du Relief) and ULTRABATICS
The possibility of the
Gremlin being a VTPR or Ultrabatic
model arose because of chat and discussions on one of the RC Groups' fora on
whether the Gremlin
would be RTF, PNF etc. Existing VTPR models like the Fish, Ecalibur, Vagabond
typically are 1.5m span and weigh upwards of 400g. This Gremlin is somewhat
heavier... early measurements suggest that it may come in at 1500g
A.U.W. for a 1.5m span model, and without mega 180° tailplane
movement for 'floops, loops and dupes'. It was in fact over
1700g!
David's model does not have the all-moving elevator
required for French style VTPR or US Ultrabatics and it is not a
lightweight by any means. I'm sure it will fly tight aerobatics on
the edge of the slope (i.e. VTPR English Style) but I doubt it will
ever fly in the same manner as those Ultra EPP or light, French VTPR models one sees on YouTube.
We'll see, the Gremlin
hasn't flown yet as I write this build piece during its assembly
over Christmas 2016.
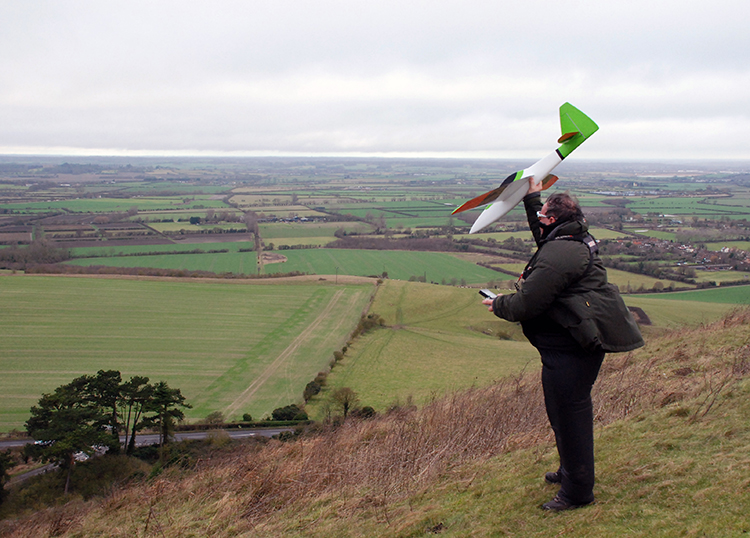
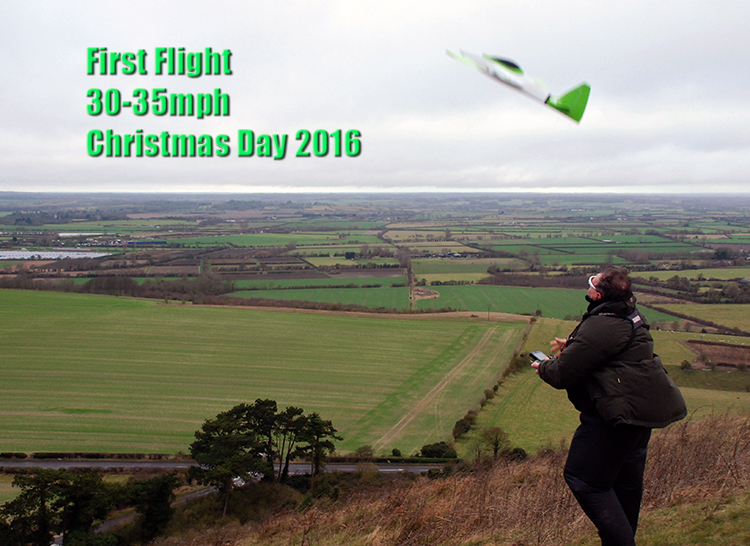
FLYING
The first flights took place on a very windy
(30-35mph) Christmas Day 2016 at Ivinghoe Beracon. There was too much elevator movement
and the CG was wrong. Landed quickly, and, after a couple
more proving flights, weight was added to the nose bit by bit
bringing the CG to 73mm from the leading edge and the noseweight up
to ~225g on the day. Subsequent flights on other slopes (at Cheriton,
Firle & BoPeep and Ivinghoe) in lighter then better
lift had this noseweight reduced to 204g then down to 180g with a
rearward CG at 78mm from the leading edge. This also improved the tightness of the loop.
As
a bystander, my impression of the Gremlin
from its first early flights is that it rolls axially and very fast,
however, the loop was not tight at all, even with snap flap engaged.
It seemed quite fast and coped with the 30mph wind with no problem,
then again it does have a wing loading of 20oz/sq.ft.
With
hindsight, the choice of wing servo was perhaps not the best
decision made as both KST H08 aileron servos lost their output gears due to
the rotor on the hill causing a heavy landing. They were replaced
with Savox 0255servos as I mentioned earlier. The butterfly needed
an increase in elevator compensation (70/75% I think) as well. The
elevator movement was set at 7-8mm and the aileron movements reduced
a little. Stall turns were fine but large side area and a wide chord
means wind can have a larger effect than one may expect.
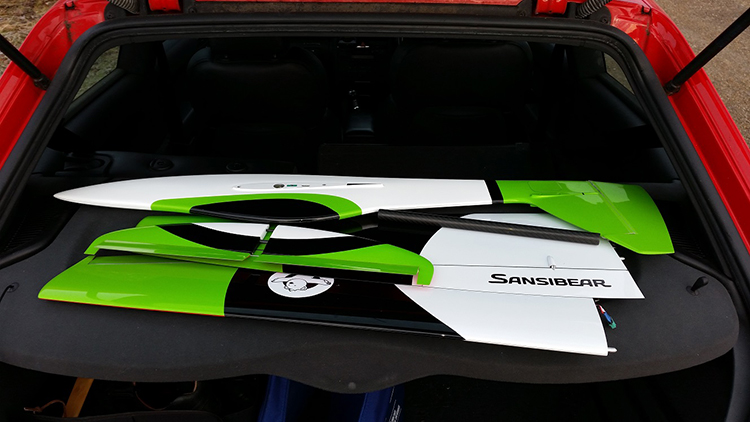
Personally,
I see no reason why one would choose this model over a Mini Vector
or Aresti 2M except that it looks a bit quirky looking and it does
lay across the parcel shelf of a family car. BITBOC (bung in the
back of car) is the acronym coined by its designer and this is what
it does.