|
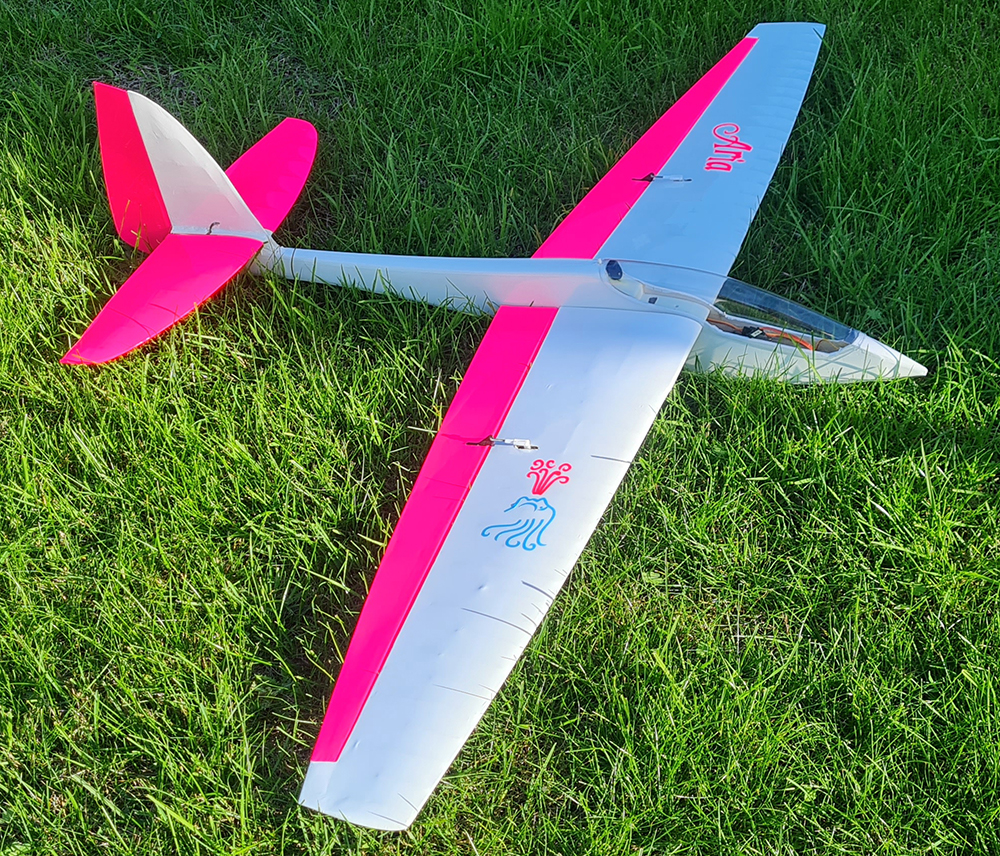
THE ARIA VTPR build by Graham Woods |
|||
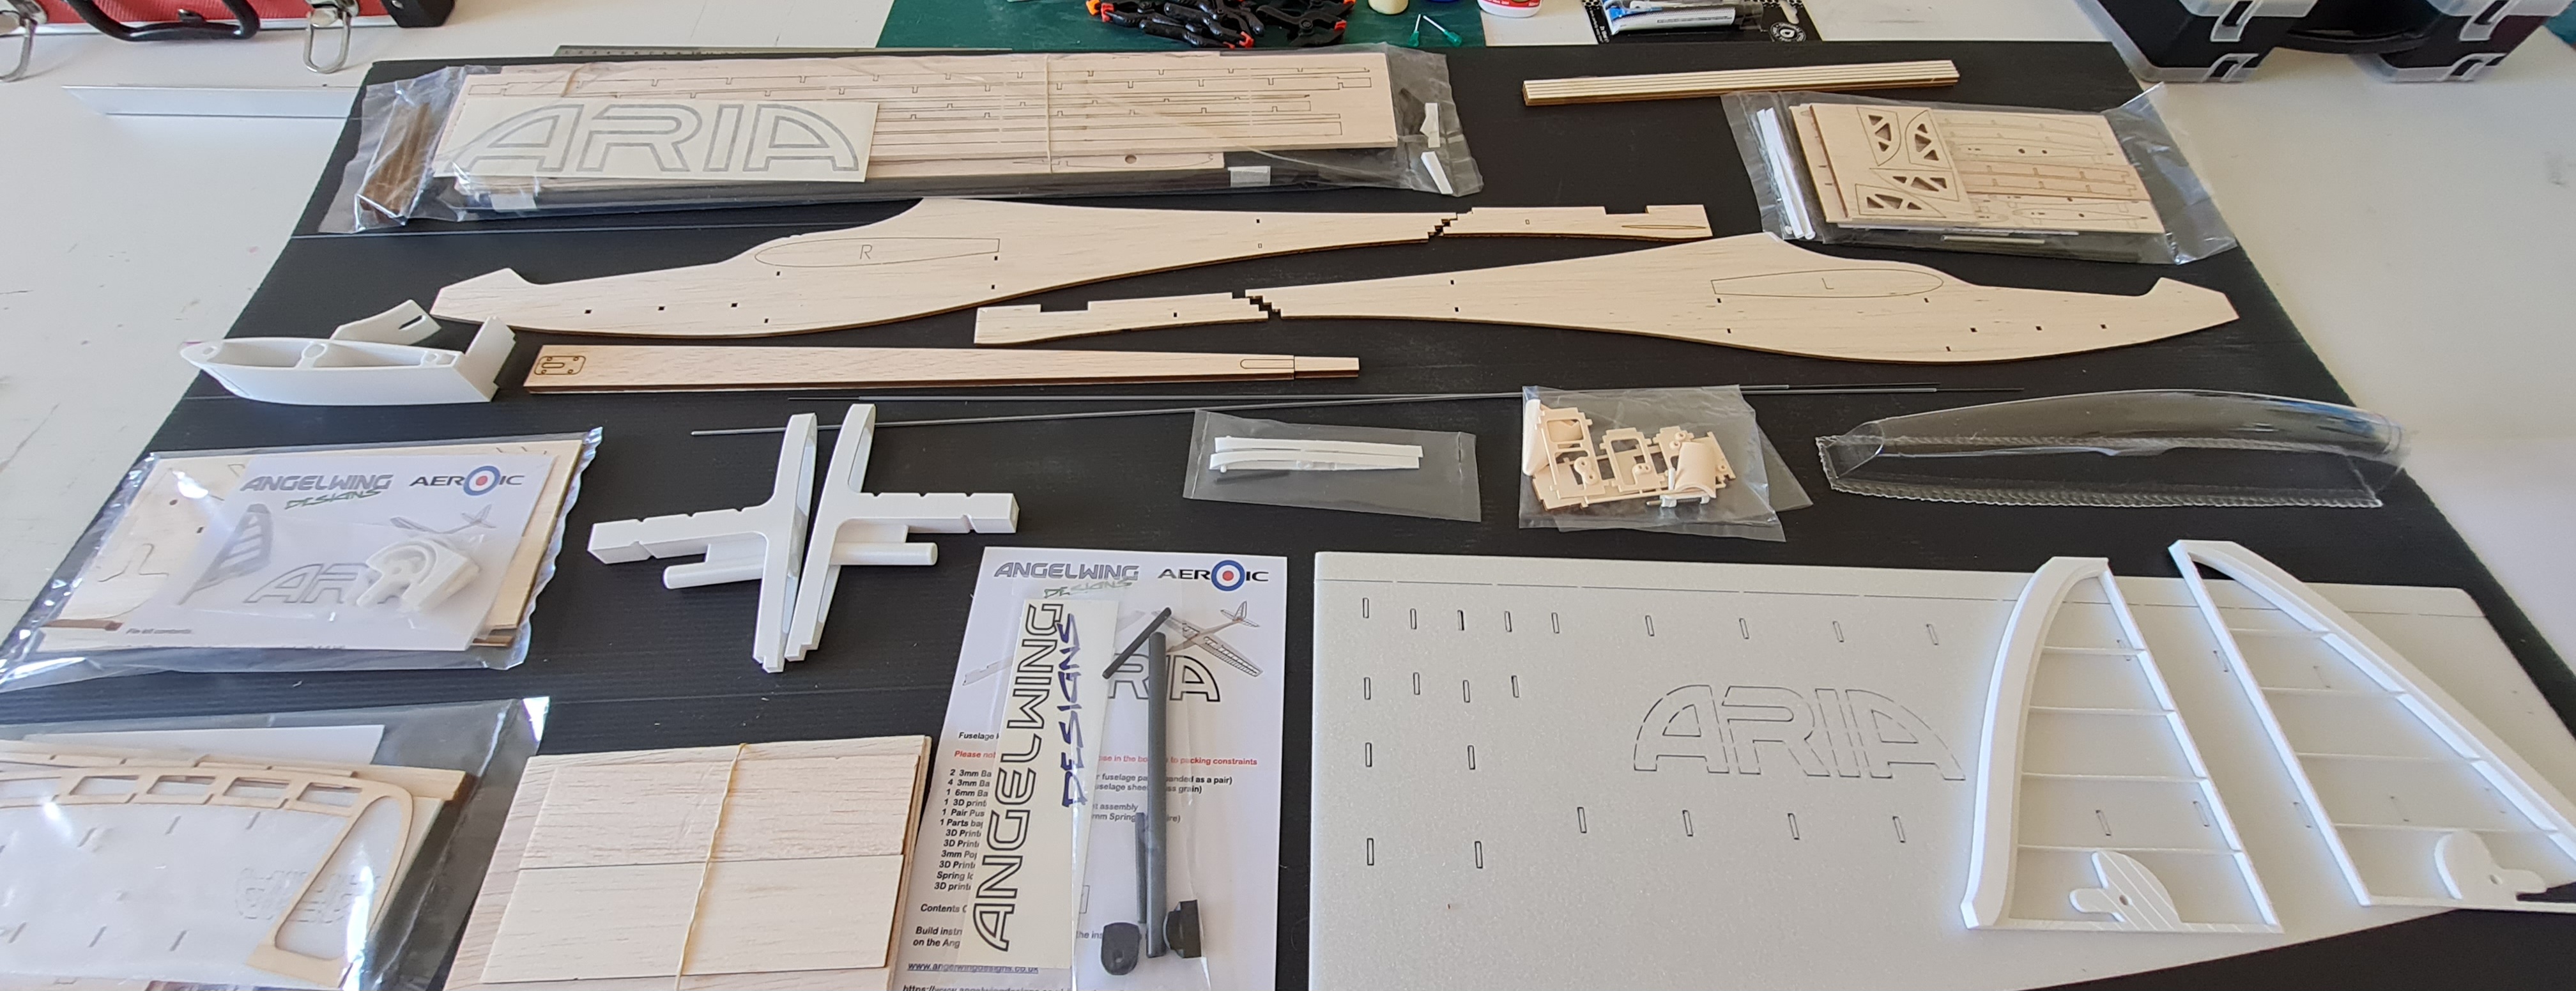
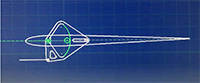
I was hoping this little lady will be dancing to an aria in the skies of my favourite slope in a few weeks time. Which aria will it be was the question but when I do make a video I think it will be to the music of Verdi's Rigoletto - "La donna é mobile" (tr. the lady is fickle or flighty). I came across this model quite by accident, serendipity one might say, I love serendipity! I liked the look of the model, it appealed, and when I saw that it had been designed with a Mad elevator and that Jim Hammond (Aresti) had designed it, I had to have one. It was a balsa kit, which I like, and the price was a very modest £125 at that time. I've made a few balsa models during my nearly 50 years of modelling. I've had foamies and carbon models but I still love balsa. KIT: The kit is comprehensive and contains 99% of what you will need to build one. It is innovative in that it contains 3D printed parts and foam jigs for the accurate building of the flight surfaces - wing, stab and rudder. I began with the rudder as it seemed easiest. |
|
||
|
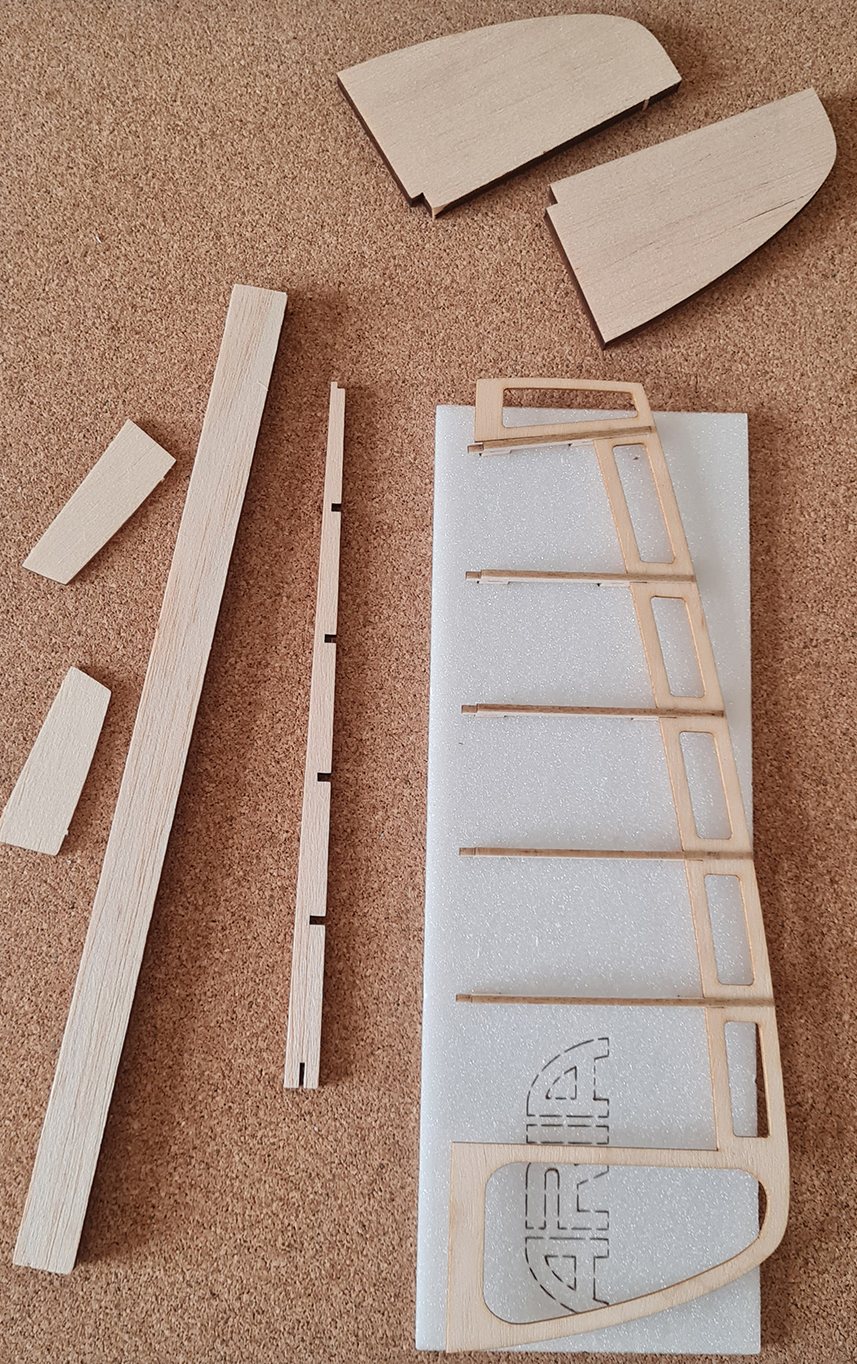
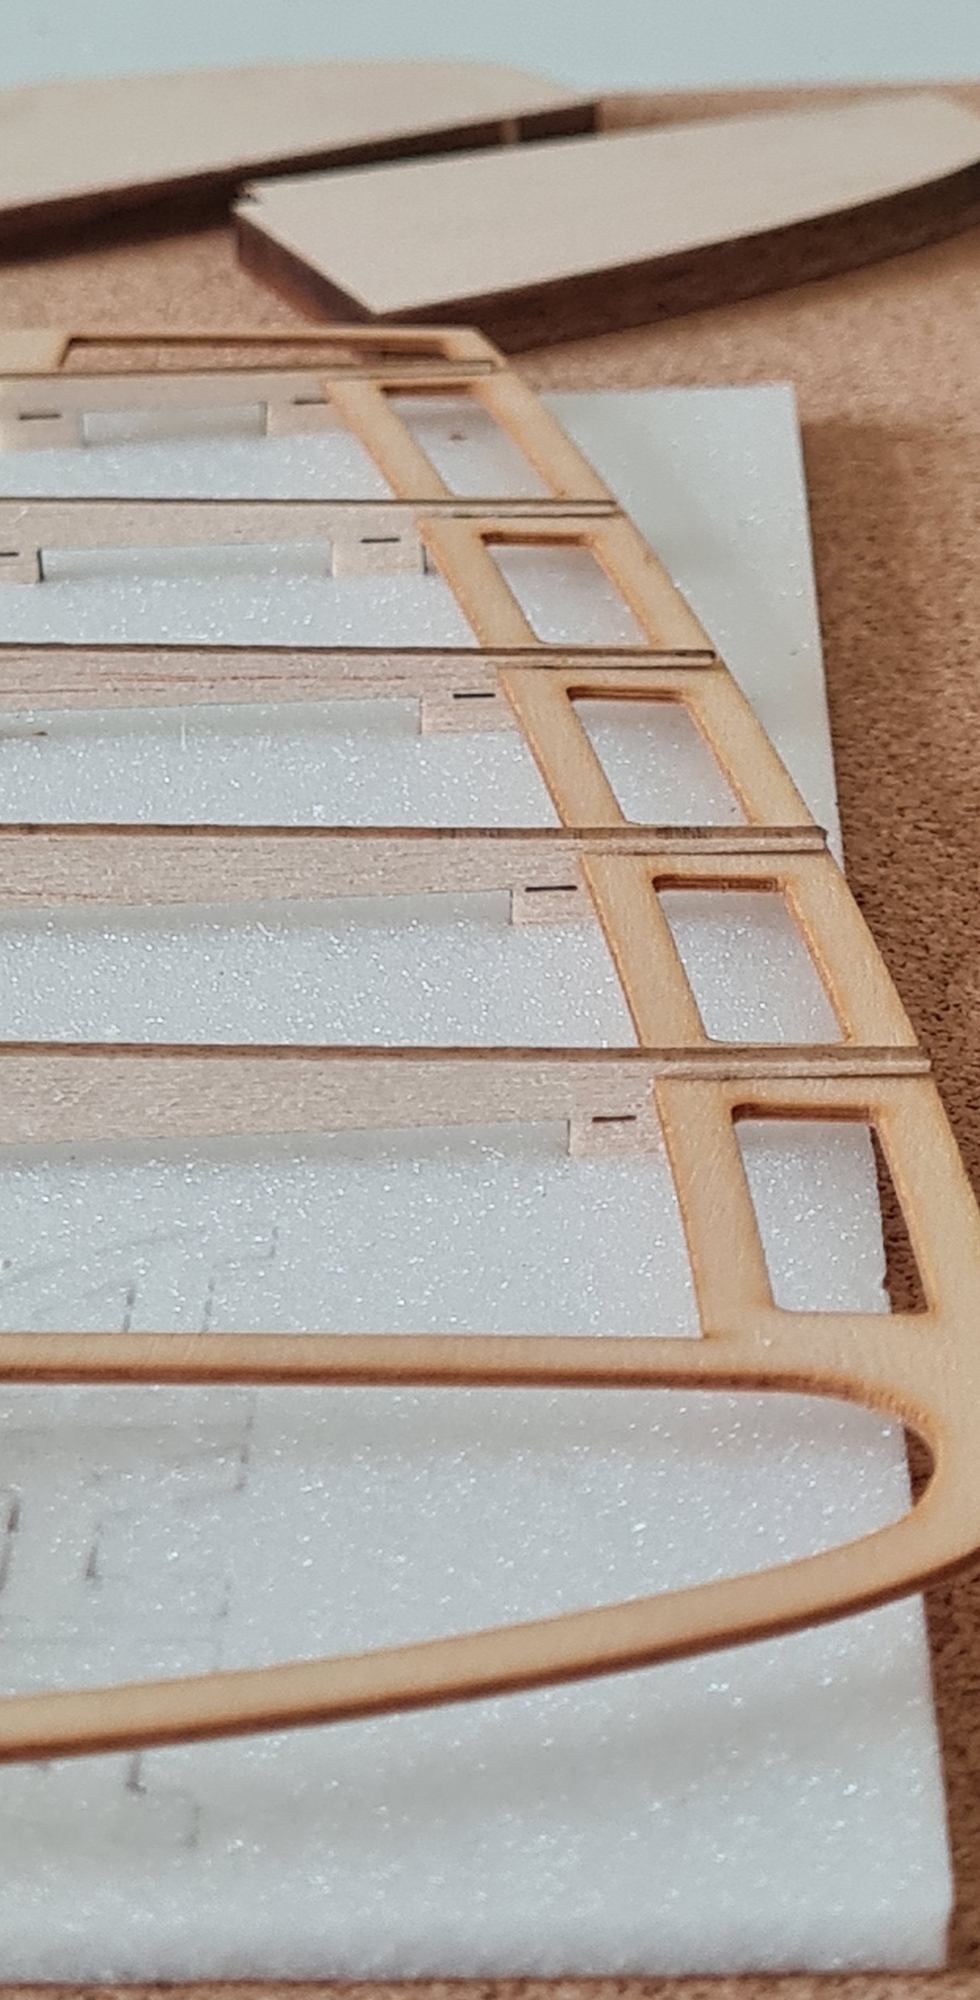
JIGGERY-POKERY: The 3mm white Depron foam sheet in the image here is punctured to take the ribs so you have the correct spacing. Careful! the ribs are very delicate and easily break. The main rudder part is ply and the ribs etc. are balsa. I used aliphatic wood glue. The slotted rudder ribs in the Depron jig are weak but keep everything in perfect position. Sanding at a later date and covering need to be done with care as the bare rudder weighed just 4 grams and only 7 grams after covering with fluo pink film. |
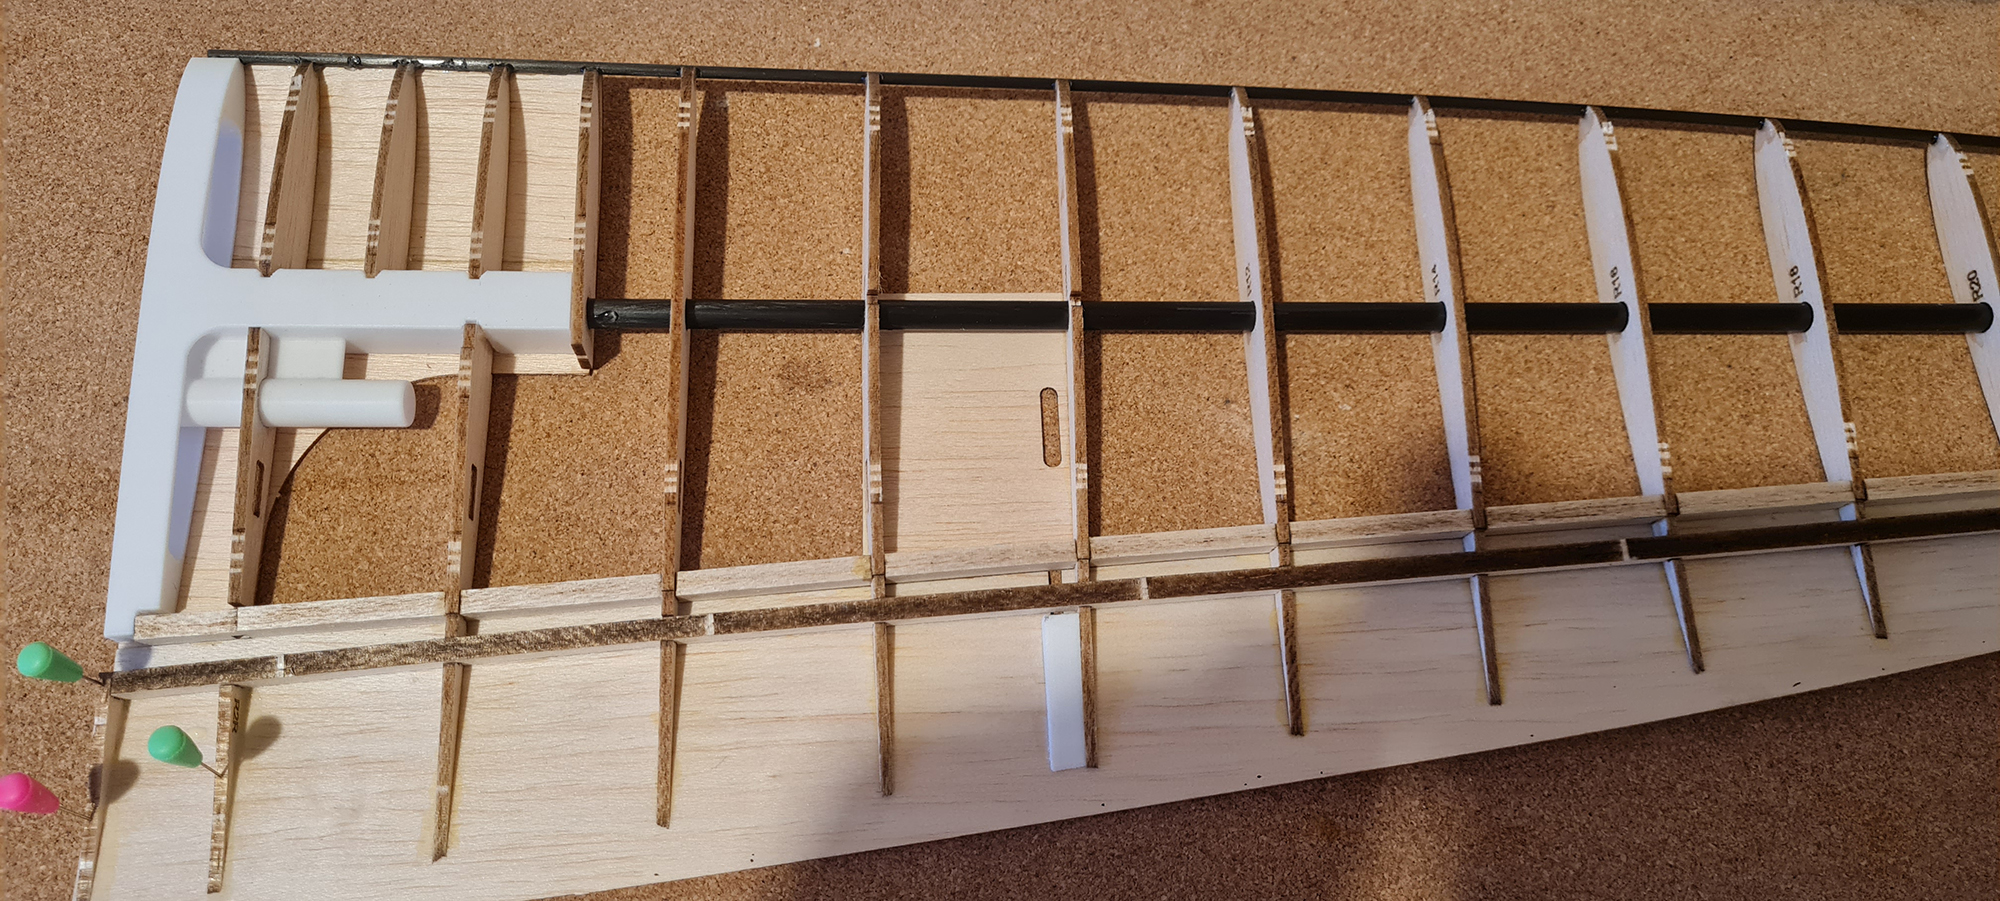
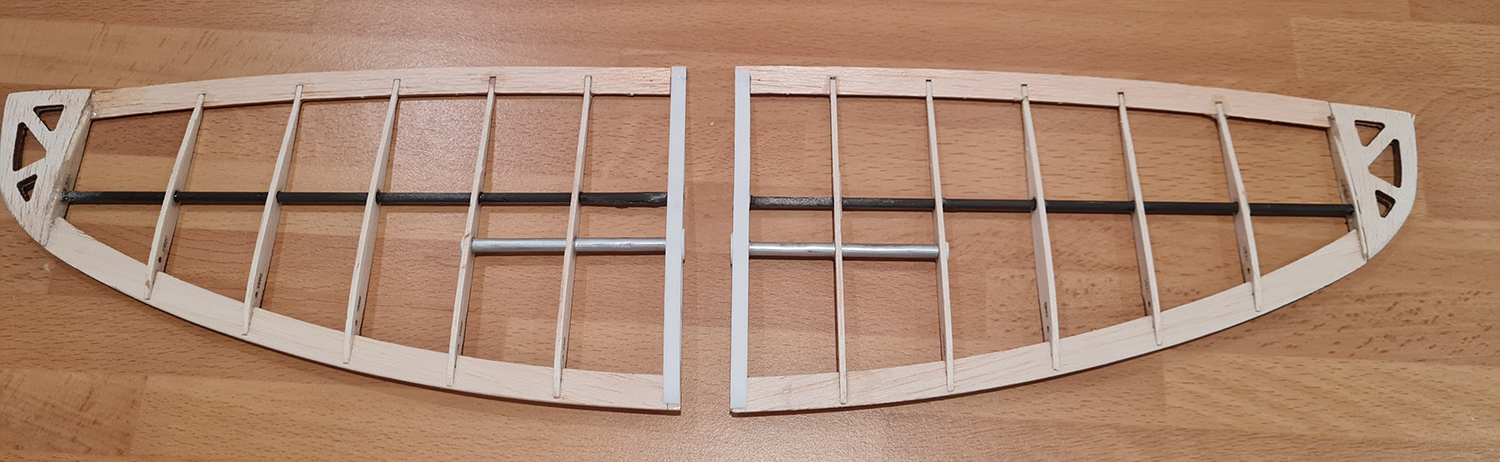
WINGS: Next, I moved on to the wings. View is of the underside of wing panel. This is fairly straightforward but once again be careful with the little rib supports. Use medium cyano for gluing 3D and carbon parts and aliphatic for the wooden parts. The wing is built on the 3mm pre-cut Depron Sheet for rib spacing accuracy, see image above of all kit parts. This is a new way of building on a kit supplied jig. Even the wing roots and dowels will line up without any alignment problems! The aileron horn 'receiver', (3D printed white piece) for want of a better word, needs to be placed where I have it make sure the horn fits in the slot on the topside first, it will need some fettling with a blade or needle file. Do not glue the aileron sheet balsa completely to the trailing edge, only the ribs tips since it has to be separated from the wing panel at a later date! The bottom sheeting is added in the same fashion. The wing tips will need adding and probably need a razor plane and sandpaper to get then into the correct shape. If you have made a model before this wing is relatively easy. It is always a good idea to 'dry-fit' everything before gluing of course. |
||
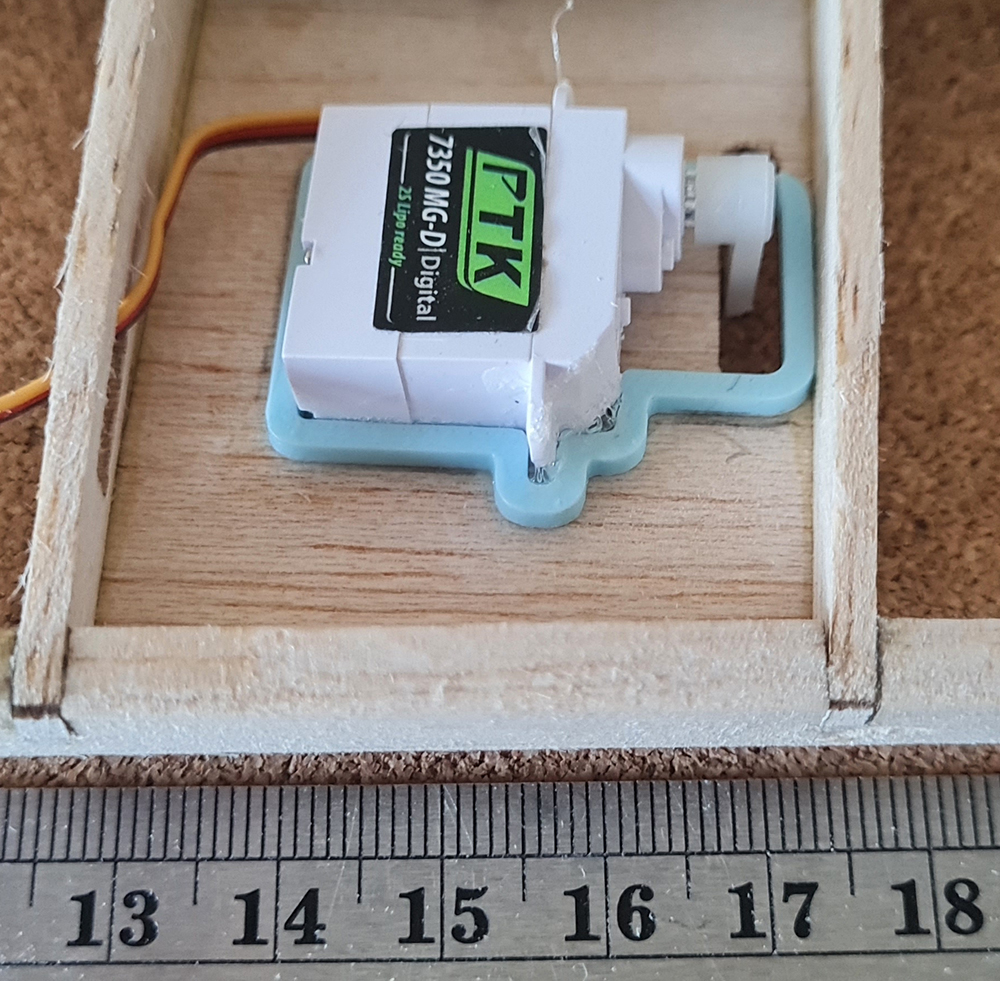 SERVO CHOICE: At this point, just a mention of my wing servos. I chose to use these tiny servos from PTK, they came from AliExpress. I am using two for the ailerons and one for the rudder, leaving a spare in case of a mishap. It may be a false economy since the resolution is not fantastic. They are not so strong as the recommended ones but I imagined a light plane in light wind does not really need 2 or 3kg pull wing servos. These are only 8,5mm thick, lighter, and easily fit in the wing cavity with 3D frames without anything protruding or needing lug cutting to fit. Their pull is 1,5kg at 6 volts. I am also using their 6v 400mAh 5 cell NiMH as well. I may need to add 25g or 45g nose weight in the hollow 3D nose. No idea where the CG should be yet. |
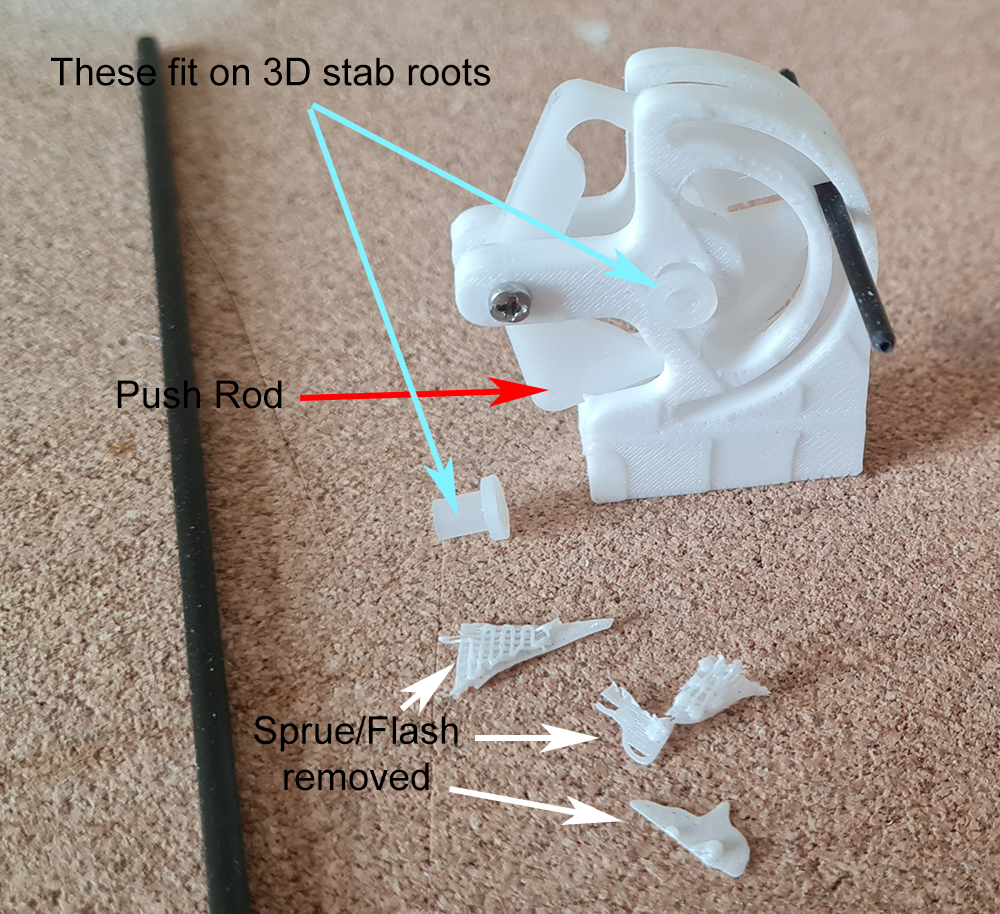
MadStab animation: https://youtu.be/1T4KsHsglTQ MADNESS: On the subject of servos - for the MadStab you will need a stronger servo with more pull and very good centring. The fin fitting shown here has to be very free so take care when assembling it and gluing the three pieces together. Cyanoacrylate, remember, can go everywhere where you don't want it! The screw only bites into the central acetate moving piece which connects to the snake wire not the side pieces, it should be loose here - you'll see when you put it together. The tiny polythene bushes, which hold the carbon elevator rod relatively tightly, fit in the outer 3D fin stab bits on the fin. The sprue/flash must be removed from the tiny 3D triangle-shaped piece. All of this assembly must be true and not bind at all. For the servo I chose a BlueBird AMS-127WV+ coreless 4kg pull servo at £21. I'm hoping this will do the job, but we'll see. |
||
|
|
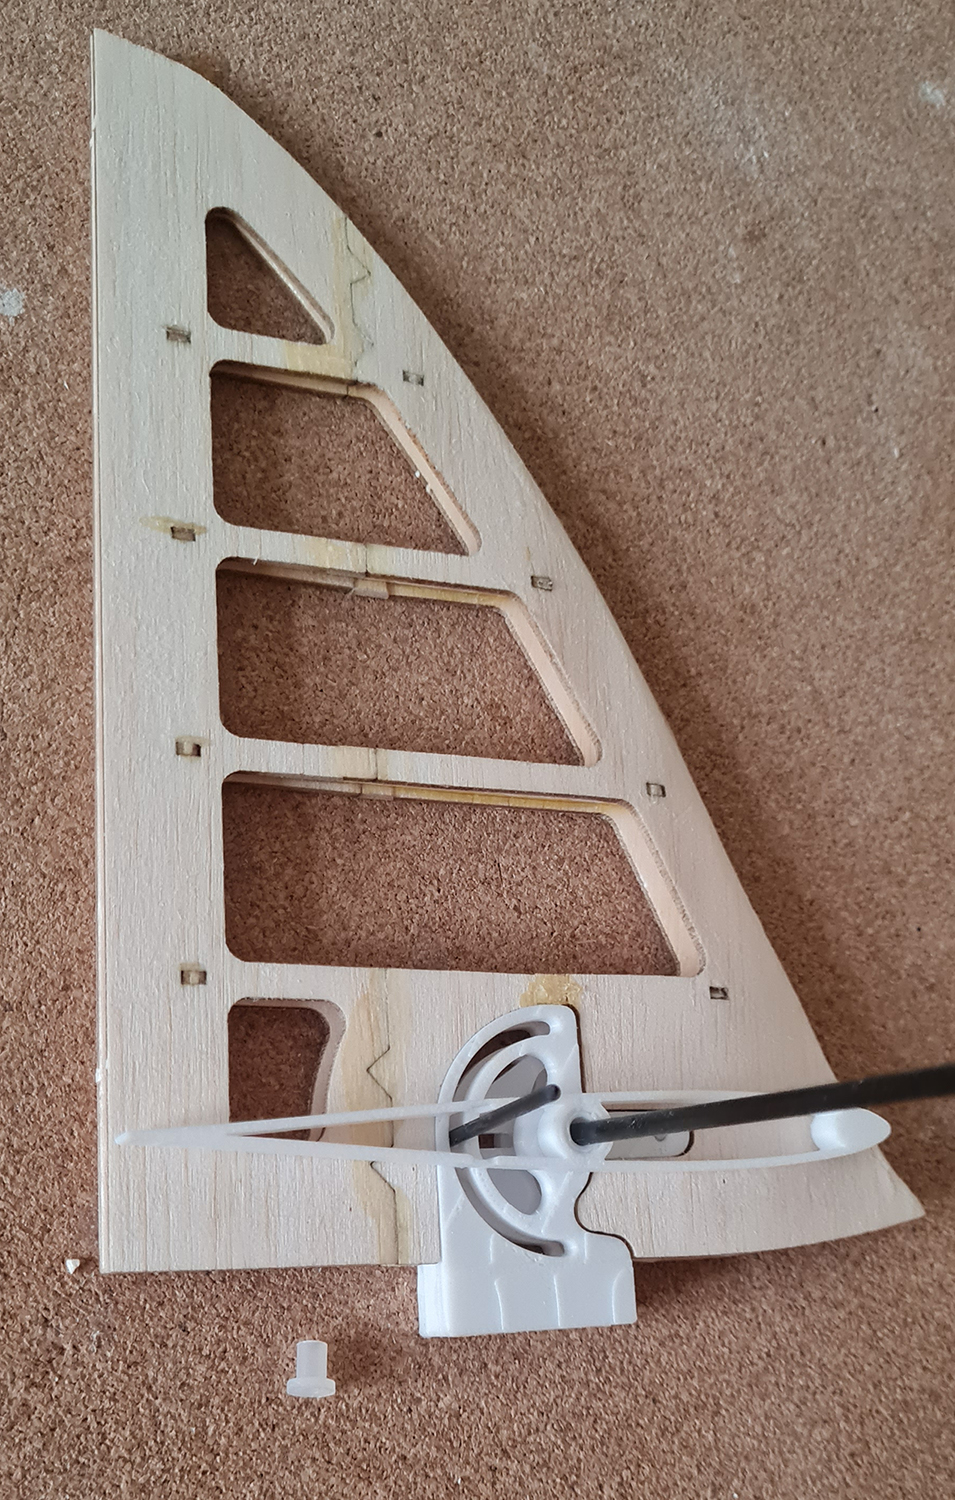 |
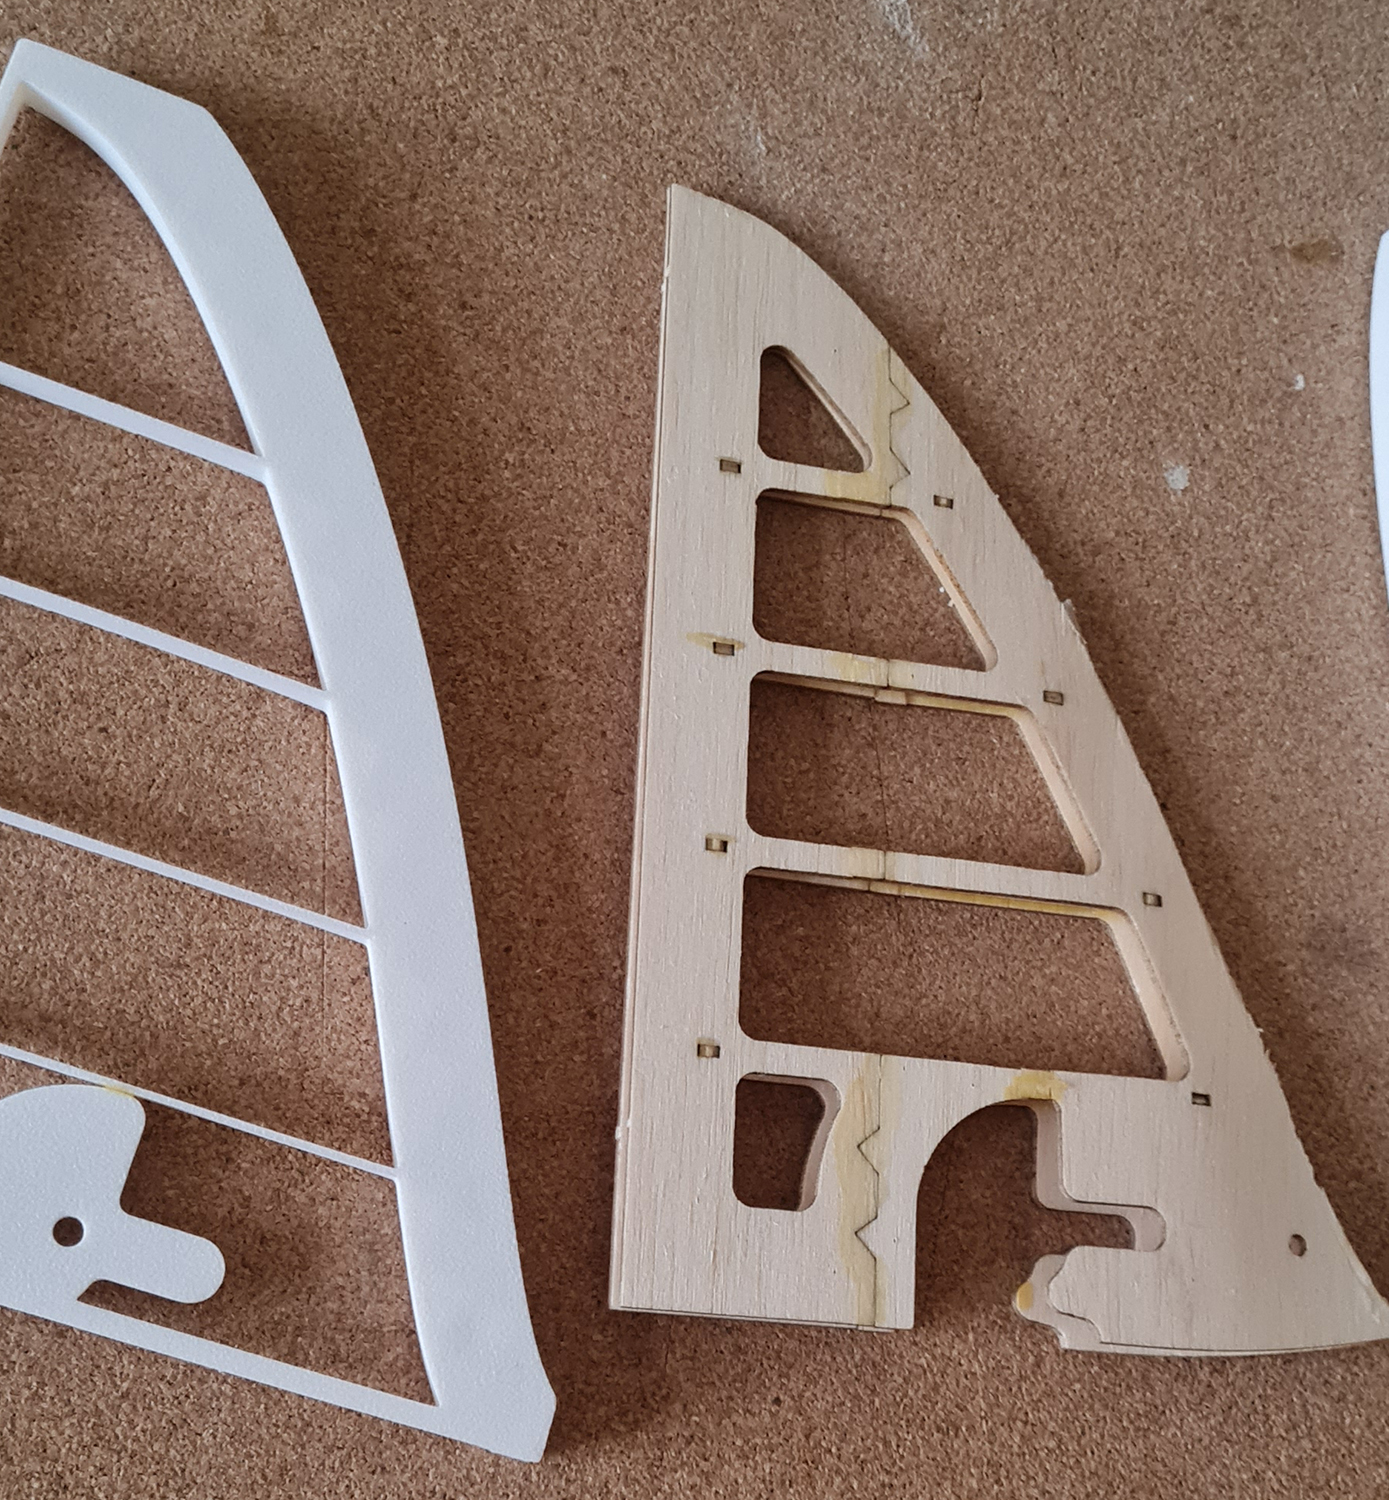
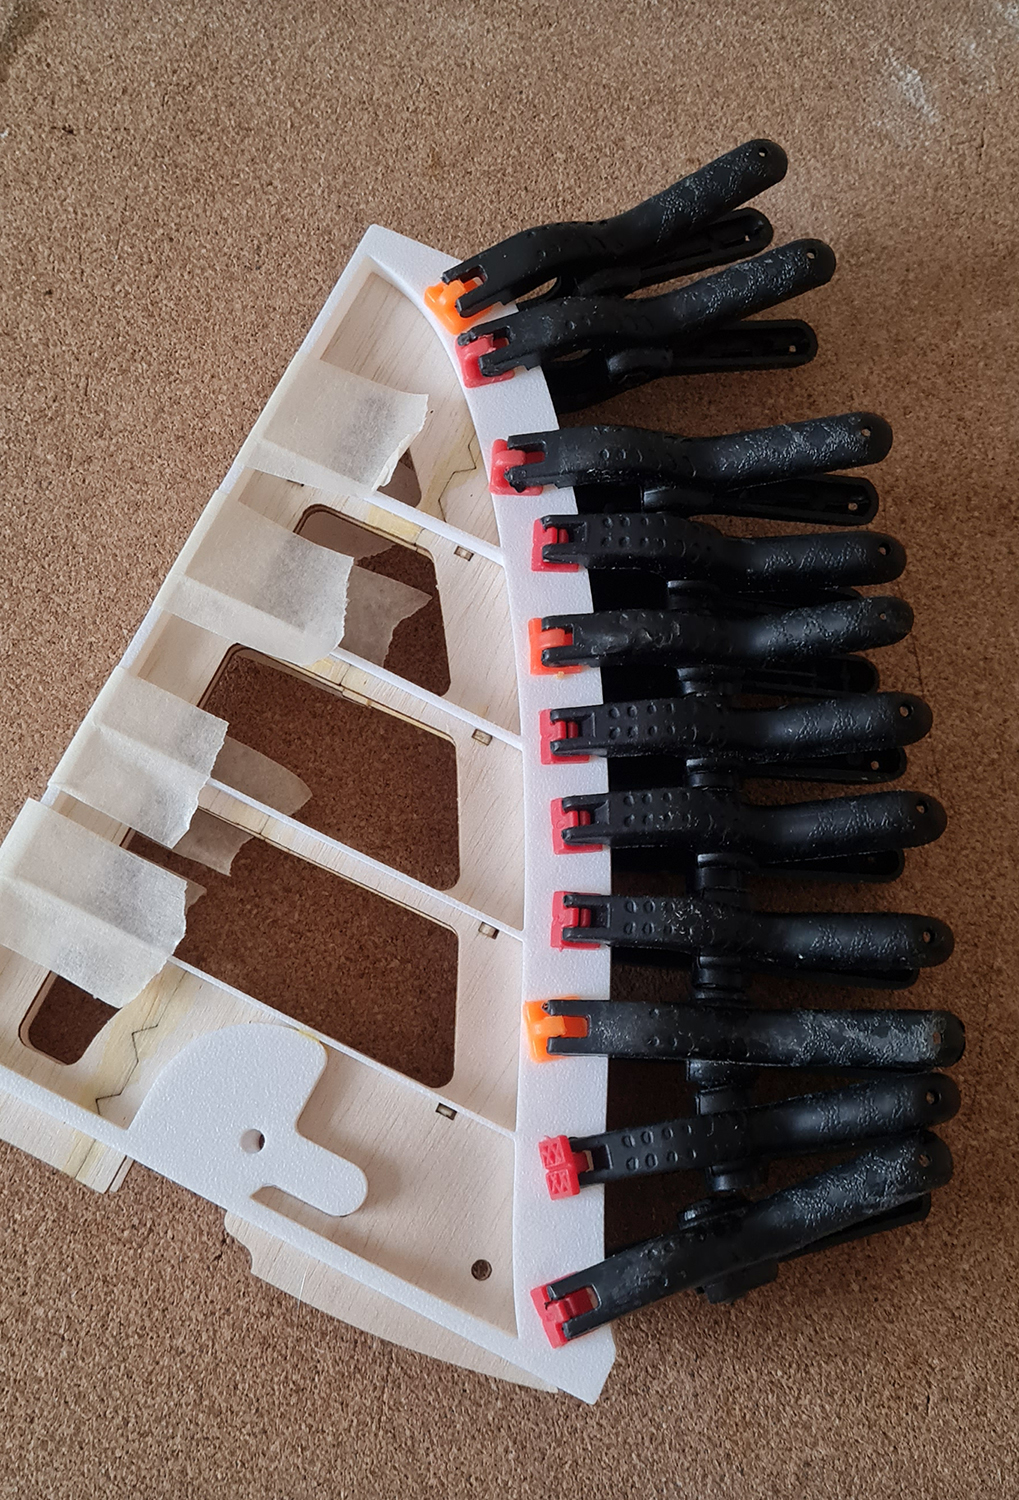
RUDDER: The rudder construction is rather innovative I must say. The kit is supplied with a pair of 3D printed jigs which sandwich the balsa parts together. After gluing the balsa and ply parts for the rudder together with Aliphatic wood glue (careful, delicate ribs etc.!) the rudder is sandwiched between the plastic jigs. I used a few spring clips to close the 'mould' and left them to thoroughly dry overnight. Do not use cyanoacrylate! in case an excess adhesive makes its way on to the 3D jig. Cyano LOVES 3D plastic, whether it is PETG or PLA ! If it does you will have a big problem! You can see where the MadStab mechanism fits from my image. It is NOT glued in yet. Dry fit everything! You cannot fit this part until you finally glue the fin to the fuselage with the fine metal piano wire snake inner in place and it is end bent into shape with a little right angle at the end hooked into the MadStab. My advice is to familiarise with this set up before you eleven think about gluing. The elevator root ribs are shown here along with the tiny polythene insert that holds the elevator dowel. The rudder fin here will need to be sanded of course. |
|
| FUSELAGE: Not much to be said
about the fuselage really except it might be a good idea to make
sure the rudder and elevator servos fit in the ply servo tray
properly - there may be sanding involved - so do this before fitting
in the fuselage. Use wood glue for the wood and use cyano for the
plastic parts.
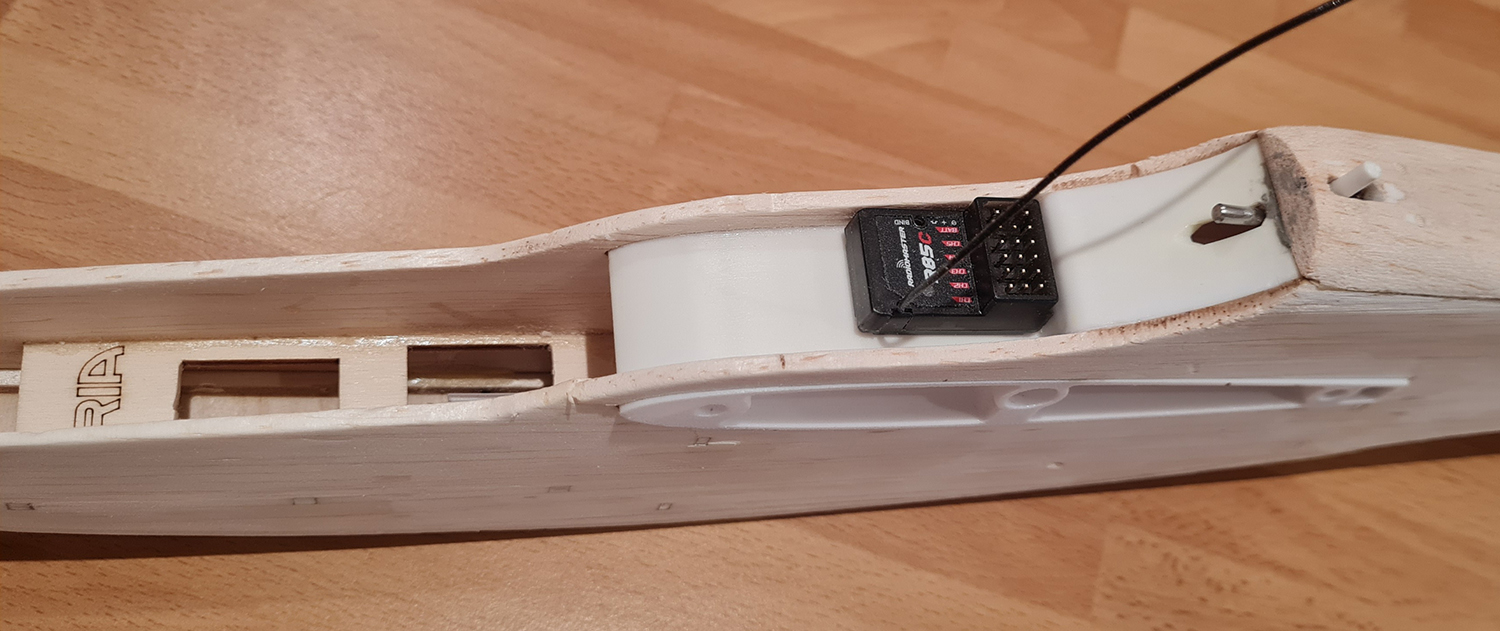
Careful alignment of the snake holder pieces/bulkheads in the fuselage is important as well as the free movement of the inners. Canopy hatch is easy and I added a couple of pieces of cocktail stick thru' its holes when I glued it in place. I chose the receiver position as the internal space is limited. I think I may fit a small switch here as well. The wing root assembly already has holes for threading aileron cables to the insides. |
|
||
|
|
ELEVATOR: The Elevator: Build it
before fixing the fin in place. Not too difficult but make sure you
have the 3D root the correct way round with the little flange facing
the fin. Covering this delicate surface, like the rudder, is tricky
as it is easy to shrink covering film too much and warp the
surfaces. I thought the tiny stab actuating pin was a little short
so I replaced it with a longer piece of carbon.
As the instructions say, the joiner is a loose fit on the aluminium tubes and a pair of pliers can be used to squeeze said tubes for a slightly tighter fit. Not sure if I like this but we'll see. A touch of paint/nail varnish/Uhu Por where the carbon rod fits inside the aluminium tubes could be an alternative. Fitting the fin assembly is the most difficult thing to do! You need three hands or a prehensile tail! The stab has to be assembled and in position, the stab snake wire has to be in place, bent to shape, and hooked on to the Mad mechanism; everything has to be at right angles and the snake free to move! SIMPLES as the Meerkats say. |
||
|
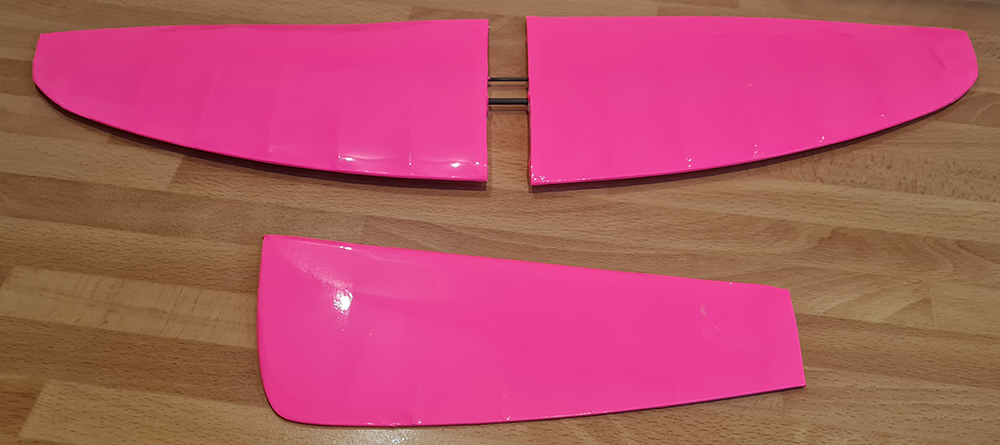
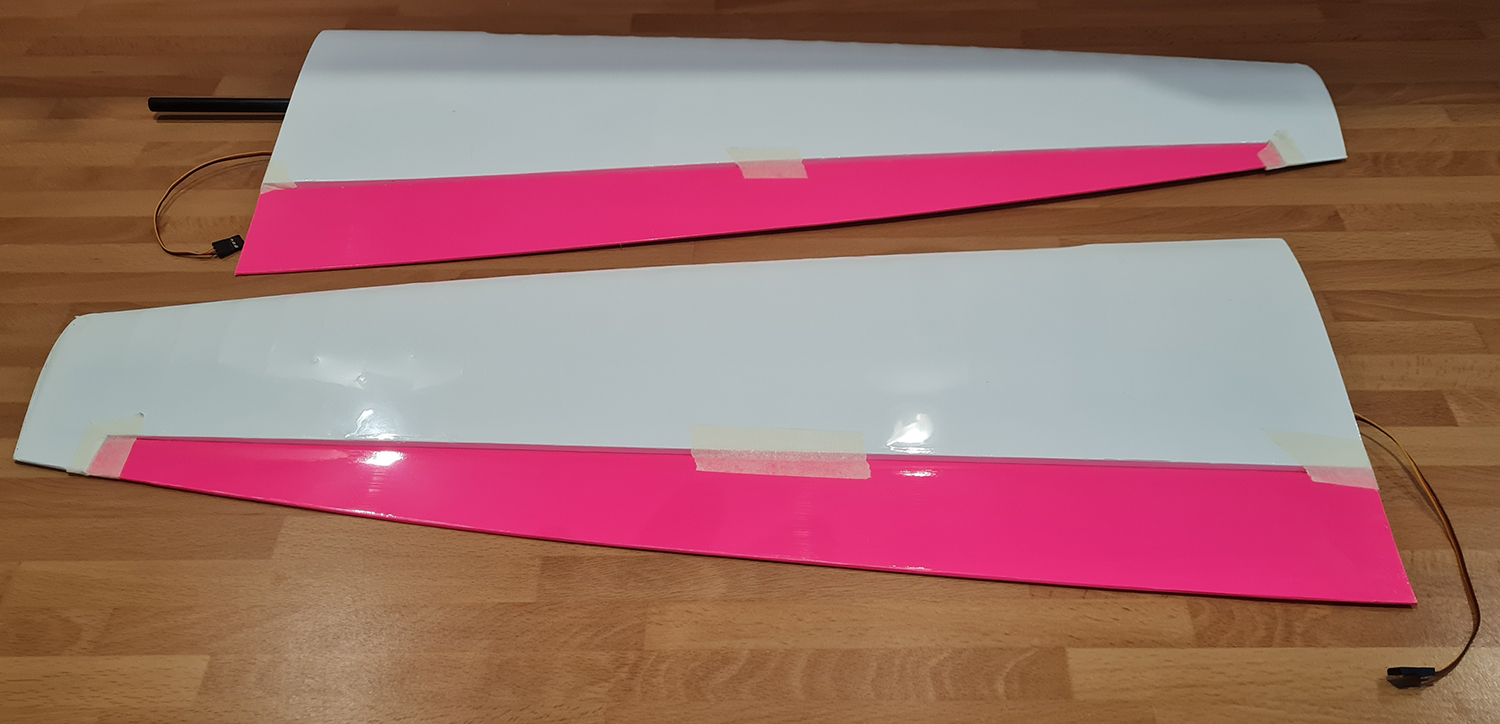
COVERING: Having finished all of the airframe I came to the covering. The wings look OK in this image and they came out just fine. I had a rather different outcome to the elevator which took me three tries to get a reasonable finish. So flimsy and apt to be twisted, I eventually settled on the fluorescent pink as it seemed to be better than the white film I had tried. I got there in the end but don't look too closely. They weighed 10g each and the rudder came out at 8g. This is a lightweight model. I've no idea how much noseweight I'm going to need but it could be 25g., we'll see. The servos are already in place in the wings with the two panels weighing in at just 96g each. Only the Mylar hinges for the ailerons and their little pushrods with nylon clevises need adding; so, say, 200g for the whole wing. I have yet to stick on my own vinyl graphics in pale blue and pink.
|
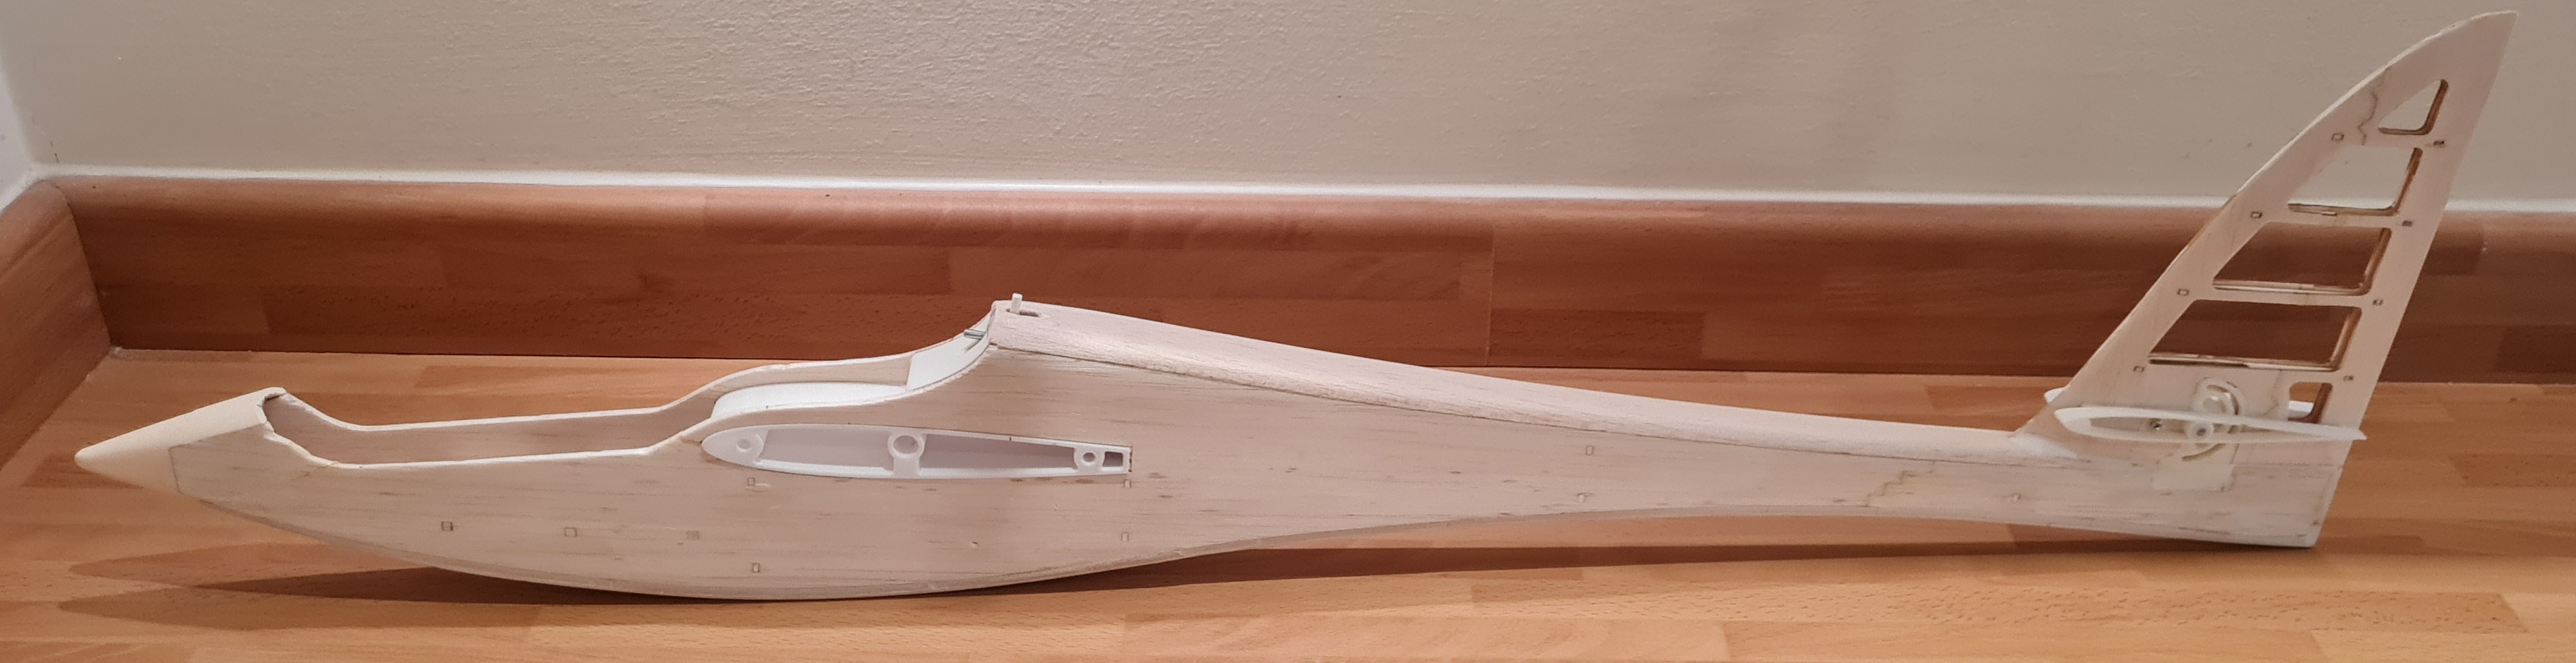
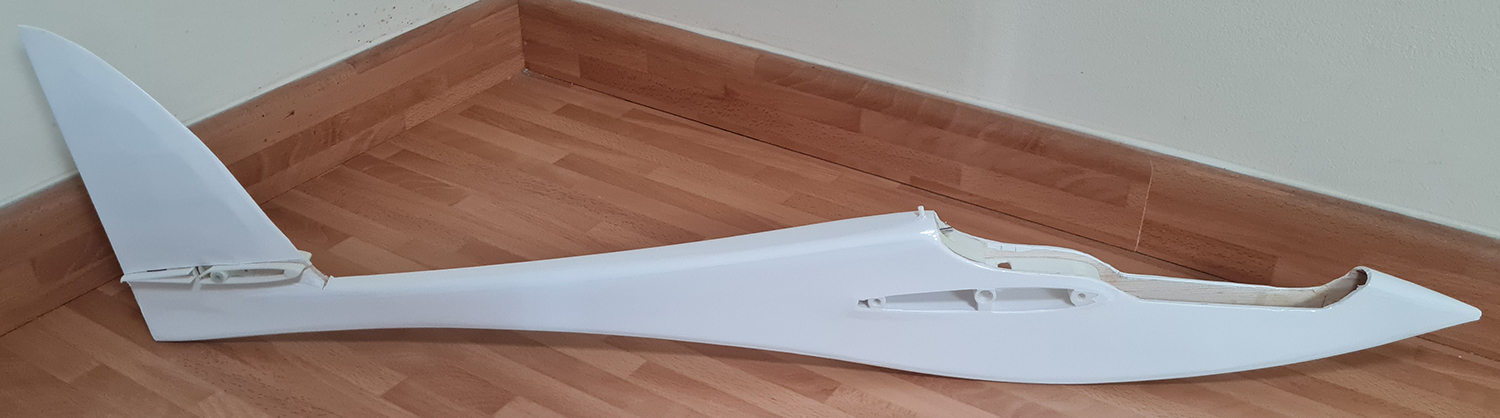
FUSELAGE: I started covering the fin and did the rest of the fuse separately. In fact, I should have covered the fin first! My bad, as they say! I also decided where to put a switch and how to thread the servo cables through the centre piece of the wing joiner. I made a half decent job of covering the fuselage - not my best work I must say - the curves around the canopy are awkward to do.. It wasn't easy to do! The polyester films I'm using for covering are either not sticky enough or, in some cases, even a brand new Swann blade doesn't want to cut. Maybe the polyester film is stale, or gone off or these un-sterilised blades you get these days are just dull. Don't know. It will need a little filling with micro balloons and epoxy resin around the stab root ribs on the fuse, I think, to tidy it up a bit.
|
||
CANOPY: I already cut the canopy to shape. I hate doing these things. I need to trim it a little more to make it look neater. I may well spray the inside since I'm not keen on the clear and the black fixing bits showing through. So I have pretty much finished the airframe, the covering and sourcing some extra bits; last job is assembling and adding/programming radio and adding some lead in the nose I guess. I vinyl cut my own stickers. Looks like I'm coming in at about 450g plus noseweight. We'll see. |

SERVOS: I already fitted my servos in the wing so I just have to make up the little pushrods with nylon clevises. The rudder and elevator servos are a tight fit in the fuselage and the very fine wire snake inner cannot really take a clevis so I found these two little fixings which will do the job. I'm sure that you have seen them before and you can still get something similar from eBay. They must be free to rotate on the servo arm since it rotates and will bend the wire if tight so they will need a couple of washers. I searched for 'Servo Push Rod Linkage Stoppers' on eBay and found some. You only need two. |
||
|
Conclusion: I began to despair that I would ever finish this model but I did in the end, after a long break, and came to despise the angst it caused me especially fixing the fin, Mad assembly, elevator snake wire. So, it is an innovative model, cleverly designed, but I’m obviously not the best builder for it and don’t have the patience nowadays. However, in my opinion there was far too much slop in the elevator in my finished model. Maybe it was my fault but I could foresee some problems with it. You need to choose a very good servo for the elevator I must say. I think it came out just under 500g for a 1,2m model covered in heavier polyester than one could use. White Oracover and Fluorescent are not the lightest materials. |
|||