|
THE FOURTH DIMENSION Well, I suppose it had to happen at some time... the time had come for a 3D printer. Brother David ordered one and it arrived in time for Christmas from the Orient… just like the Star in the East pointing to Bethlehem but no Magi on camels just a Polish Yodel driver in a white van. Come to think of it he came from the Eastern Bloc too…on with the saga… Once upon a time there was a steep learning curve to climb, it went every which way - up, down, across, sideways and back and forth and it took a long, long time. A whole new world of jargon and acronyms had to be learnt in a short space of time and so it was. New discoveries every day: PET, TPE, FDM, G-Code, Slicer, STL, Acrylonitrile Butadiene Styrene, Fused Filament Fabrication, Polylactic Acid etc. Welcome to the world of 3D printing. I’m never ceased to be
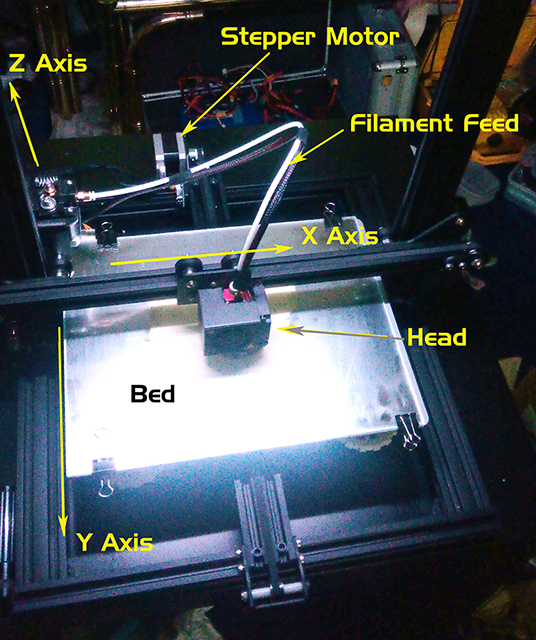
amazed how my inkjet manages to squirt ink in exactly the right
place time after time - a stepper motor, driven by a sloppy rubber
belt and a print head with five different inks, fractions of a
millimetre away from a sheet of paper, amazing. Look at your inkjet – a
3D printer uses just the same principle. Three stepper motors (can
be more) going in three directions squirting, or should I say
extruding, molten plastic at 200ºC, not ink, in a precise position
0.1mm away from the bed and that’s all there is to it, or so it
seems, but for the learning curve.
Layer, by layer your ‘print’ is built up. It takes hours or even days. Of course it is a precision instrument, every part of the frame has to be ‘square’ and rigid but it works. Entry level prices are now down in the low hundreds, even less than £100 I see from the web. Don’t worry if you can’t do CAD drawings, you could learn but there are a lot of websites dedicated to free and paid-for downloads of all sorts of things for the modeller, useful or not. One
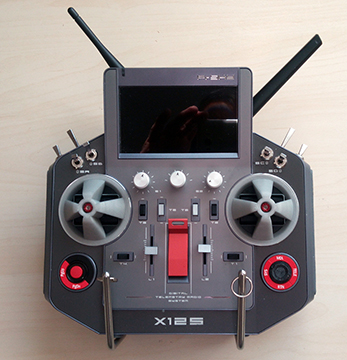
of the first things bro printed for me were a pair of slick holders
for my transmitter, a free download.
They hold the sticks in place when I
poke my Tx in my rucksack since I can’t always carry my aluminium
case with me. A gimmick yes, but here you are, they work. While
you’re here go to
thingiverse.com
and type the name of your radio gear for instance. See
what comes
up. You can even print your own 3D model plane
3dlabprint.com. One thing that surprised
me was the number of different types of thermoplastic that can be
used in 3D printing. I got to 21 before I gave up looking. Plastic The
most common type and the cheapest is perhaps PLA (Polylactic acid);
others like ABS and Polythene you will have heard of along with
Nylon. These plastics are sold on a spool and are called Filament,
sold in 1kg or 500g spools. There are various other types of
specialist filament, those with embedded copper, aluminium or steel
powders, also carbon fibre, Graphene or sawdust which looks like wood and can
be stained. There are even flexible, rubbery filaments. Just Google
3D filament and you will see a myriad of types. Not all filaments
are
So how does it work? It starts with a CAD program which is used to produce an STL file. This is what you download if you are not able to design your own CAD drawings. This STL file is loaded into a program like CURA (free) which effectively Slices your drawing/design into 0.4mm layers for the 3D printer. You can view the 3D CAD drawing in this program and manipulate it. This Slicing program is used to create G-Code, a relatively simple list of instructions which, line by line, tells your printer where to move, i.e. the 3-axis coordinates. G-Code is also used in CNC machining. There are various forms of G-Code, of course. A typical line of G-Code with X, Y and Z coordinates from Cura looks like this:
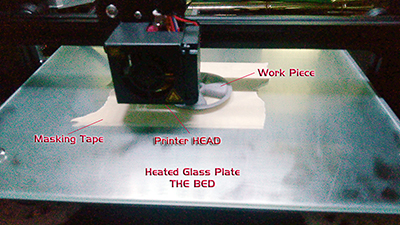
Problems, problems It all sounds plain printing doesn’t it? It’s not. Temperature is easily controlled, the head to bed distance however is not so easy over a 300mm square bed. There are four knobs controlling the level of the glass bed and the distance from the nozzle to bed is less than the thickness of a sheet of A4 printer paper. There are various sensors available to measure this distance based upon capacitance, inductance or IR optics. Some printers have auto-levelling. The regular ‘eyeball’ is pretty good for those with practical experience. And there’s more… Another major problem is getting the plastic to stick to the bed in the first place. It is very frustrating when the ‘skirt’ or ‘raft’ or ‘brim’ becomes detached from the bed but just imagine your three hour print comes unstuck after just one hour. It can happen. (These skirt, rafts or brims are the initial types of layer put down to clear the extrusion nozzle and later discarded.) Some people replace the glass bed with a mirror arguing that mirrors are flatter, i.e. more optically perfect; others put a layer of masking tape down, others cover the glass surface with a special type of plastic sheet. There are more solutions to help with adhesion: Pritt, a type of water soluble hairspray and even a solution of ABS in acetone painted on the glass. It is a matter of trial and error although it appears that experience is the key factor is setting bed levelling and getting prints to stick. Just imagine the glass bed heating up and expanding, how good is the overall temperature. A variety of water soluble special spray for bed sticking is a very good buy.
Laser Cutting Since the 3D printer is basically an X-Y plotter, what about replacing the plastic extruder with a powerful laser. It can be done by the amateur, it is done. A blue laser diode with a power of 2-3 watts (compared to 5mW for a pointer) will engrave/burn wood, leather and plastic and even cut out ply and balsa ribs. GOGGLES ARE ESSENTIAL! Need
to get one from
Banggood.com before the Government bans them of course. Certainly 3D printing is here to stay. In the real
world all sorts of unimaginable things will become possible.
Sintered Steel, Titanium and Aluminium parts are already able to
made using powerful 200W lasers and metal powders in much the same
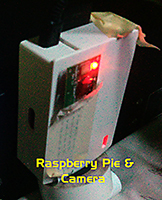
way. For the amateur dabbler, Smartphones, Raspberry Pi, Arduino and are already being pressed into service to run amateur ‘printers’ work while away. Control your 3D printer from home with a SmartPhone and Wifi and watch your printer building a plane while you’re at work. Bro is already on to this, he has already rigged up a Heath Robinson camera and Raspberry Pi to control his printer and watch his prints being created. THE FOURTH DIMENSION Continued
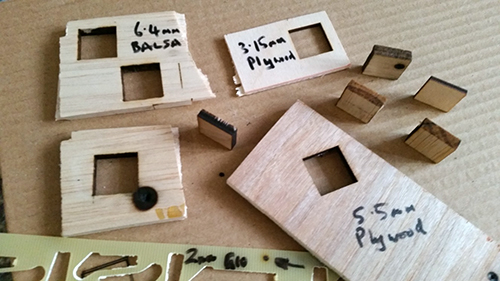
The laser burns and cuts through cardboard, balsa and ply - generally needing several passes of the cutter for thicker materials. The output power of the laser is variable. It hardly touches PCB but most materials can be scorched (leather) or plastics melted or metal etched. Pity no one hardly uses balsa these days to make models; cutting 50 ribs would be a doddle! White foam materials cannot be cut btw. It struggles with F4 PCB board too.
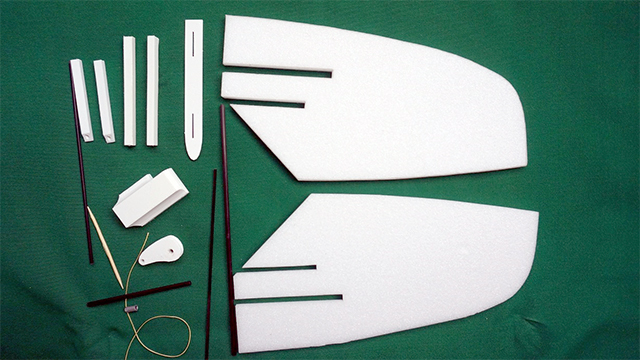
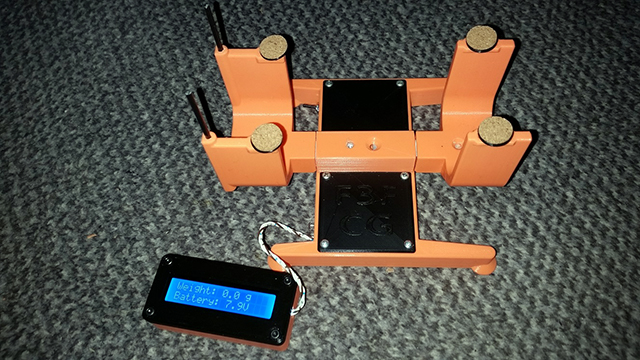
3D printing is well understood by brother David now, in February 2018, and he has embarked on a useful device that was 3D printed. An automatic CG measurer accurate to <1mm. The orange and black stand, and the black/orange electronics box, all 3D printed. This could well be the subject of a future article. It uses an Arduino electronics platform (type of mini computer) and two 5kg load cells. It operation is simple, place your model (wing) on the four pads with the leading edge touch the vertical carbon rods and the readout tell the CG in mm from the leading edge. A visit to thingiverse.com is recommended, type in any subject and see what comes up. For the modeller there are innumerable things to make. Bro designed and made this MadStab set of 3D printed tubes and pulley parts for his Ahi lightweight sloper.
It's amazing what is available to the enthusiast these days, trouble is you need to be somewhat of a polymath to get your head around it all: electronics, CAD, coding etc. Fascinating thing is that these days practical hobbies are on the decline. This article was originally published in The Beacon, magazine of the Ivinghoe Soaring Association in Spring 2018 by me, Graham Woods. |
 This
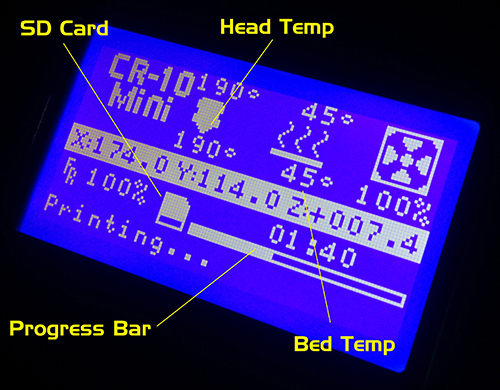
G-Code is copied from your PC to an SD Card which is loaded into the
3D machine. The G-Code contains all the instructions for the
printer. The two things I have not mentioned so far are the
extrusion head temperature and the bed temperature. You can see them
here in a screenshot of the printer screen. The extrusion
temperature depends on the type of plastic in use, it is usually
somewhere between 190º-230ºC. The bed temperature can be from
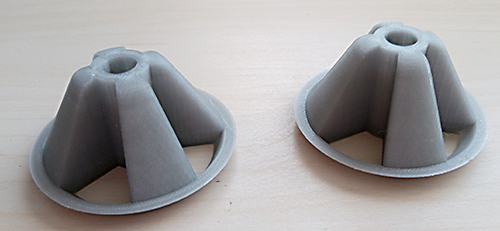
ambient up to 70ºC. The filament is generally 1.75mm in diameter and is
extruded down to 0.4mm through the print head nozzle; 0.4mm layers
are built up to create the work piece. The extruded ‘string’ is at
this temperature as it emerges from the print head; it is
immediately cooled by a fan; however, each layer must adhere to the
previous one for it to work. The important thing to remember here is
that the distance from the head to the previous layer is only 0.1mm
and it has to stick to that layer.
This
G-Code is copied from your PC to an SD Card which is loaded into the
3D machine. The G-Code contains all the instructions for the
printer. The two things I have not mentioned so far are the
extrusion head temperature and the bed temperature. You can see them
here in a screenshot of the printer screen. The extrusion
temperature depends on the type of plastic in use, it is usually
somewhere between 190º-230ºC. The bed temperature can be from
ambient up to 70ºC. The filament is generally 1.75mm in diameter and is
extruded down to 0.4mm through the print head nozzle; 0.4mm layers
are built up to create the work piece. The extruded ‘string’ is at
this temperature as it emerges from the print head; it is
immediately cooled by a fan; however, each layer must adhere to the
previous one for it to work. The important thing to remember here is
that the distance from the head to the previous layer is only 0.1mm
and it has to stick to that layer.
.jpg)
 Our fourth
dimension, TIME, moves on; here with the arrival of a powerful laser
from China. Lasers for cutting are not so expensive
(<£100) and can do considerably more damage than a green laser
pointer aimed an aircraft. The laser has a high energy as it is at
the blue end of the spectrum centred on 450nm with a power of
2300mw. (A laser pointer is less than 5mW by way of comparison.)
Special goggles must be worn at all times with this laser,
especially in case specular reflections that can occur. The plastic
filament extrusion head from the 3D printer mentioned in this
article has simply been replaced by the laser mounted in, of course,
a 3D printed housing! It has its own associated PCB running on 12V.
Our fourth
dimension, TIME, moves on; here with the arrival of a powerful laser
from China. Lasers for cutting are not so expensive
(<£100) and can do considerably more damage than a green laser
pointer aimed an aircraft. The laser has a high energy as it is at
the blue end of the spectrum centred on 450nm with a power of
2300mw. (A laser pointer is less than 5mW by way of comparison.)
Special goggles must be worn at all times with this laser,
especially in case specular reflections that can occur. The plastic
filament extrusion head from the 3D printer mentioned in this
article has simply been replaced by the laser mounted in, of course,
a 3D printed housing! It has its own associated PCB running on 12V.
 There’s more...